Create Study Activities and Set up the Timeline
Tip
"Study Activities" are used to separate a study into phases. For example, the phases may be:
Analytical Method Development and Validation
Dose-Range Finding Developmental Toxicity Study
Oral Developmental Toxicity Study
Tolerability Study
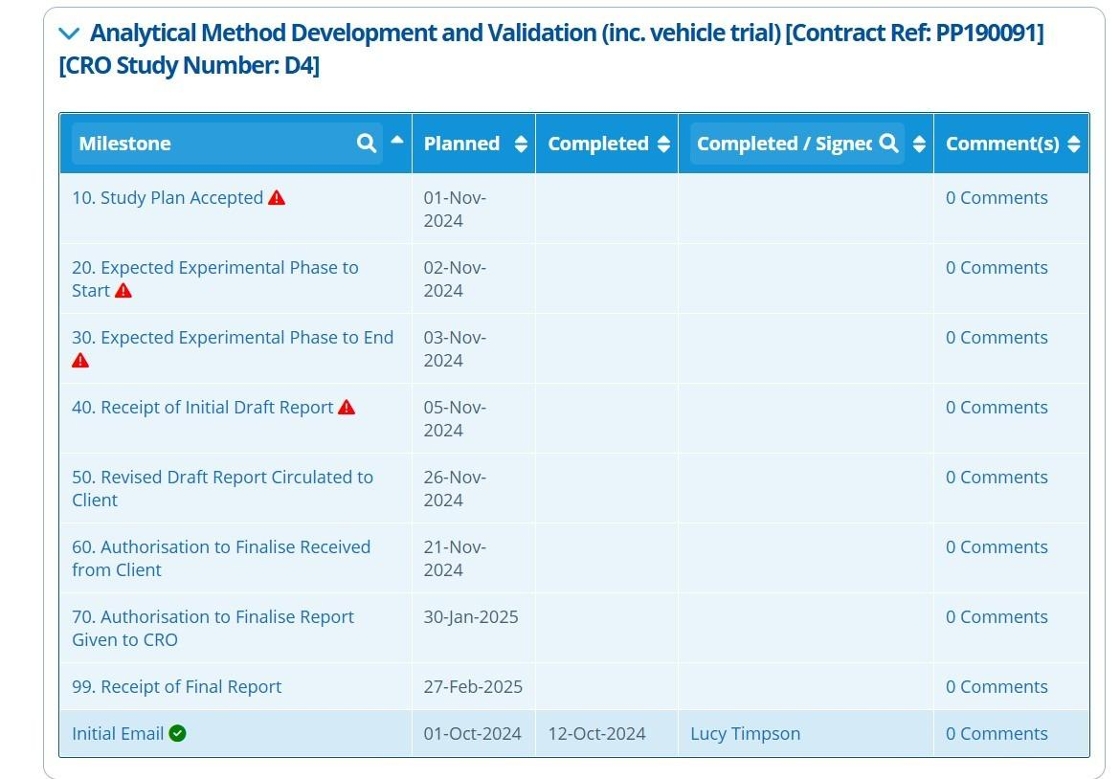
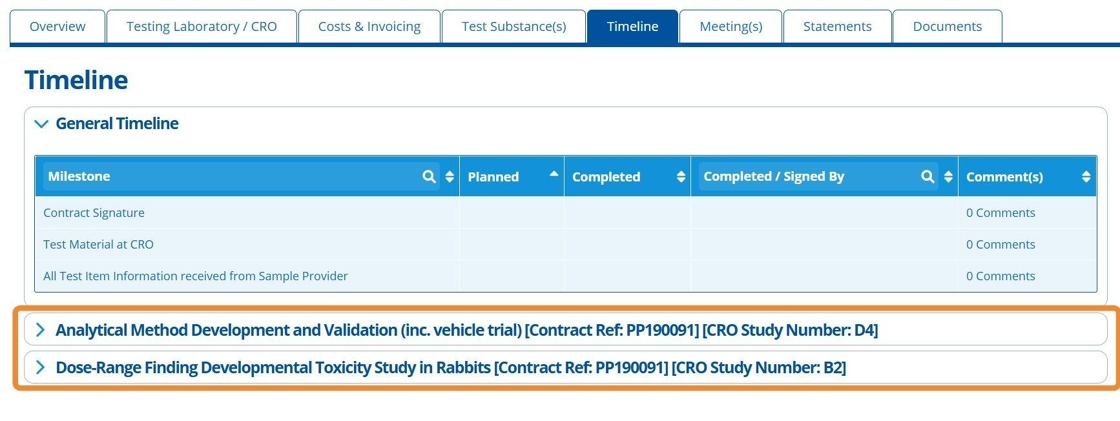
Each study activity will have a corresponding timeline created on the study's "Timeline" tab. Each timeline has "Milestone" events that break the study activity into smaller stages. The milestone events have "Planned" and "Completed" dates to track current progress and to plan future deadlines.
Example: A study activity named "Tolerability Study" may have a milestone event for "Receive Study Report from CRO". The milestone is assigned a planned completion date of 12/11/2024.
When a milestone becomes "Overdue", a notification is sent to users that have notifications enabled for that study record (a milestone becomes overdue when the planned date has passed and the completed date is not populated).
Each milestone event can have comments added against it, triggerring notifications to be sent to users with notifications enabled - see Notifications Guide for information on setting preferences.
Set up the Activities / Study Phases
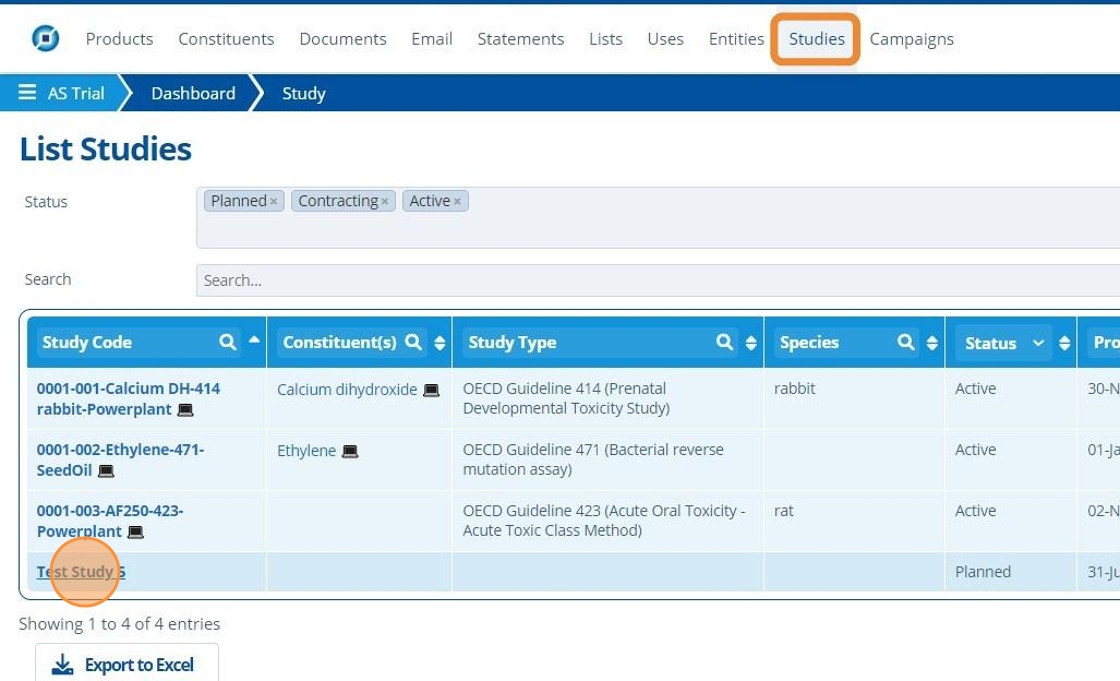
1. 👆 Navigate to Studies 👉 Select the study of interest from the list.
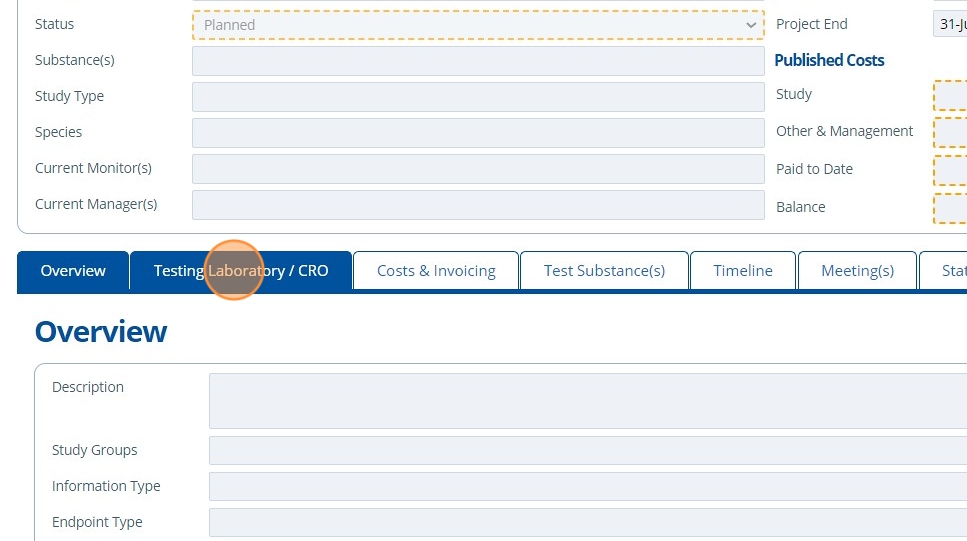
2. 👆 Navigate to the "Testing Laboratory / CRO" tab.
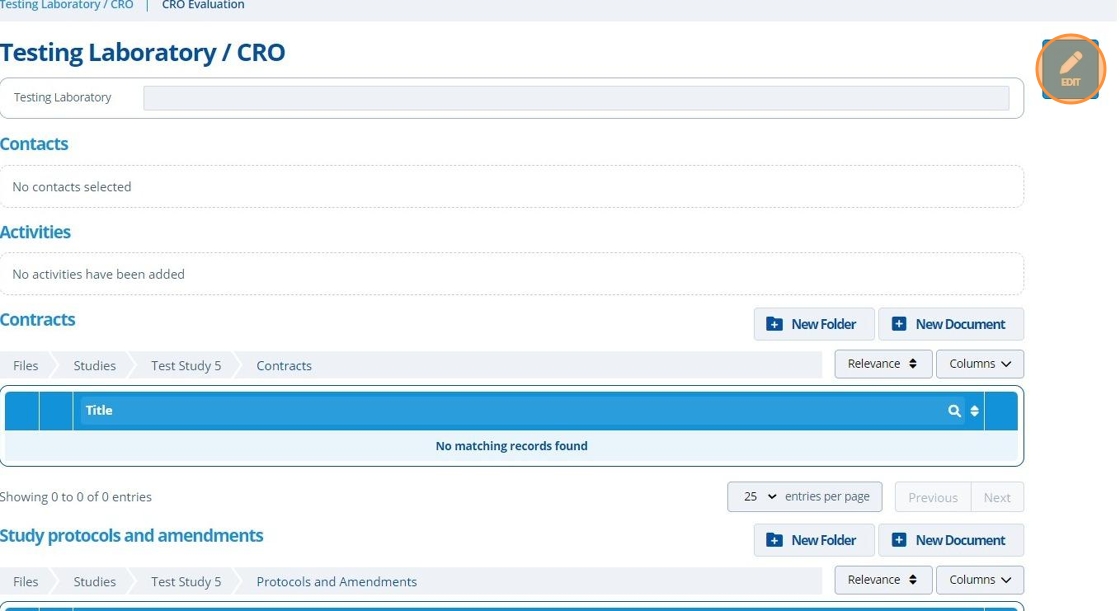
3. 👆 Click "EDIT".
4. 👆 Click "Add Study Number".
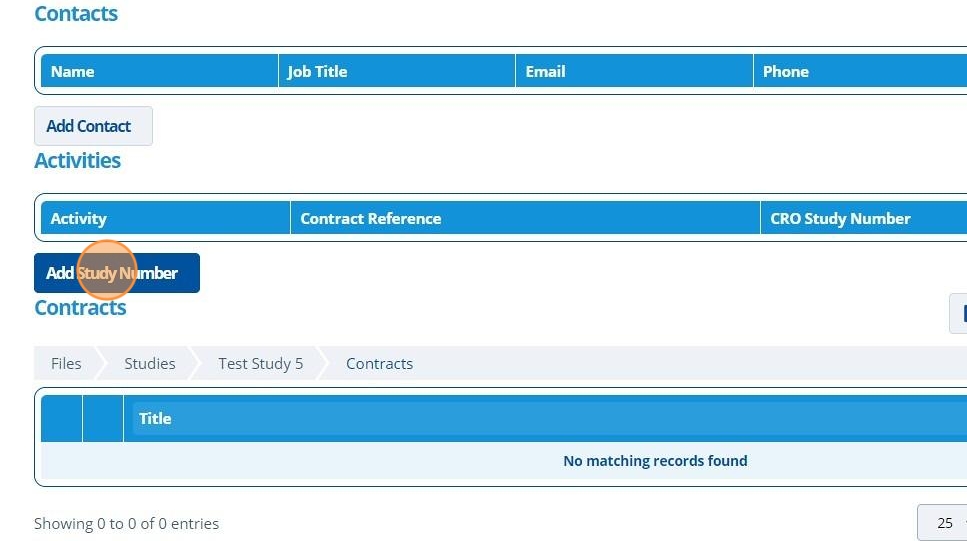
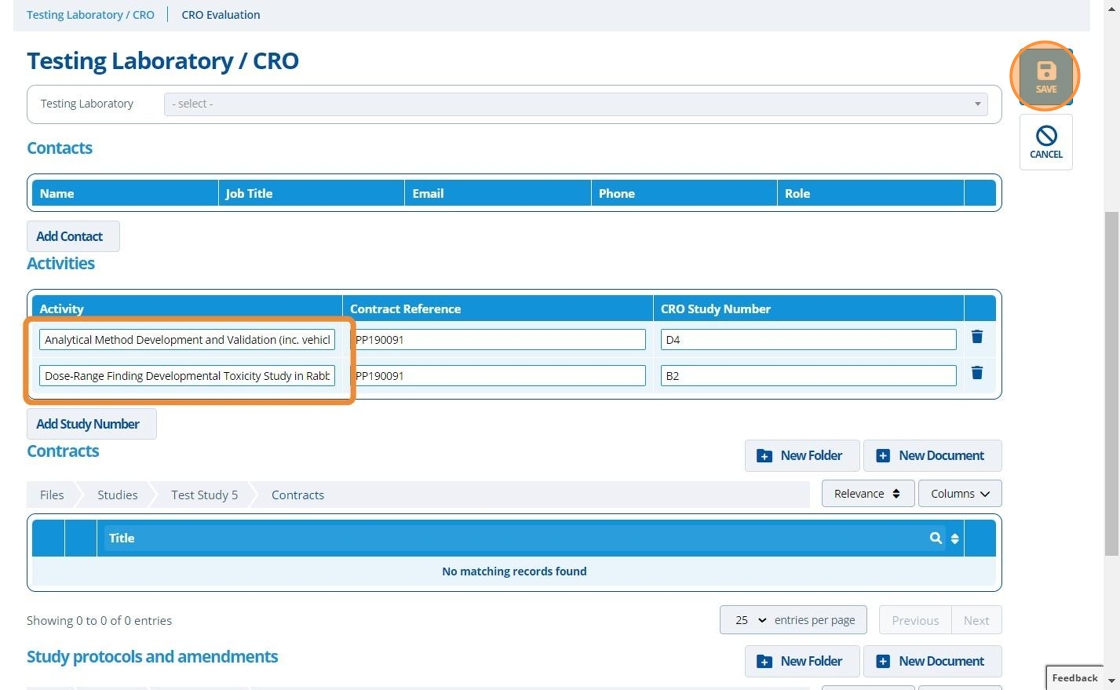
5. ✍️ Enter an Activity, Contract Reference and CRO Study Number.
Note that the text input into these fields is used on the timeline tab.

6. 👆 Click "SAVE" after adding all activities / study phases. For each activity added, there will be a corresponding timeline created in the "Timeline" tab - see step 8.
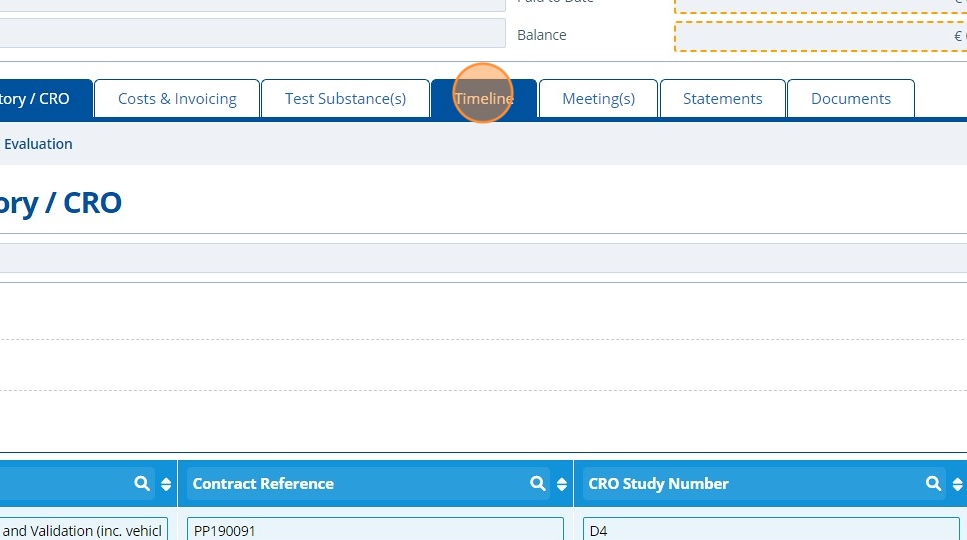
7. 👆 Navigate to the "Timeline" tab.
8. 🥳 The two activities and their corresponding timelines have been created.
Populate The Timeline
Tip
- There is a timeline for each study activity created and an additional "General" timeline for the overall study.
- The timeline for study activities depends on the template selected upon study creation. The timeline options are environmental, toxicology or analytical. The timeline templates can be edited in the study configuration settings.
- Milestones keep track of event progress via dates. Comments can be added against them and are used to provide reason for delay or to note that a date has been updated.
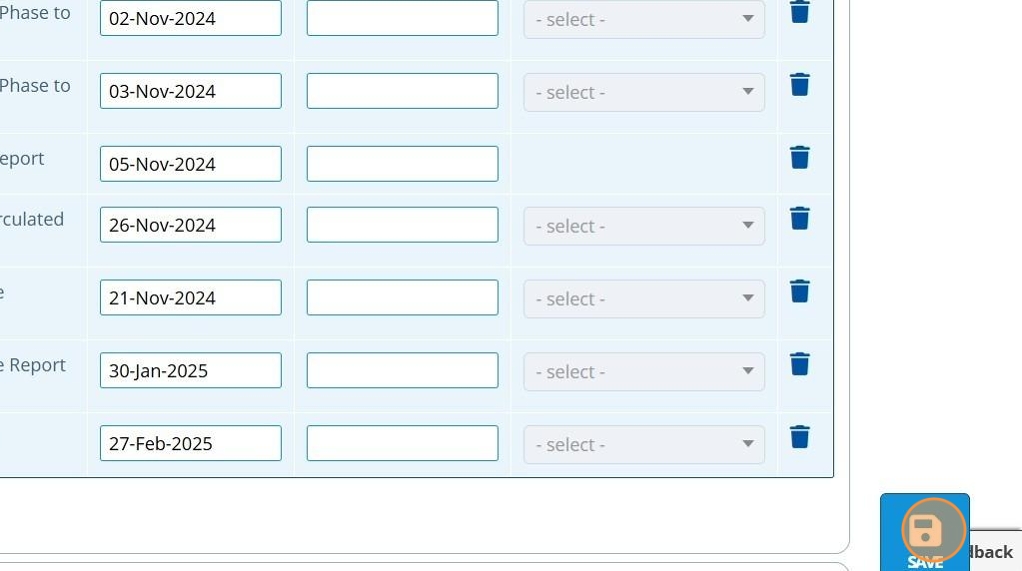
9. 👆 Click "EDIT" on the timeline tab.
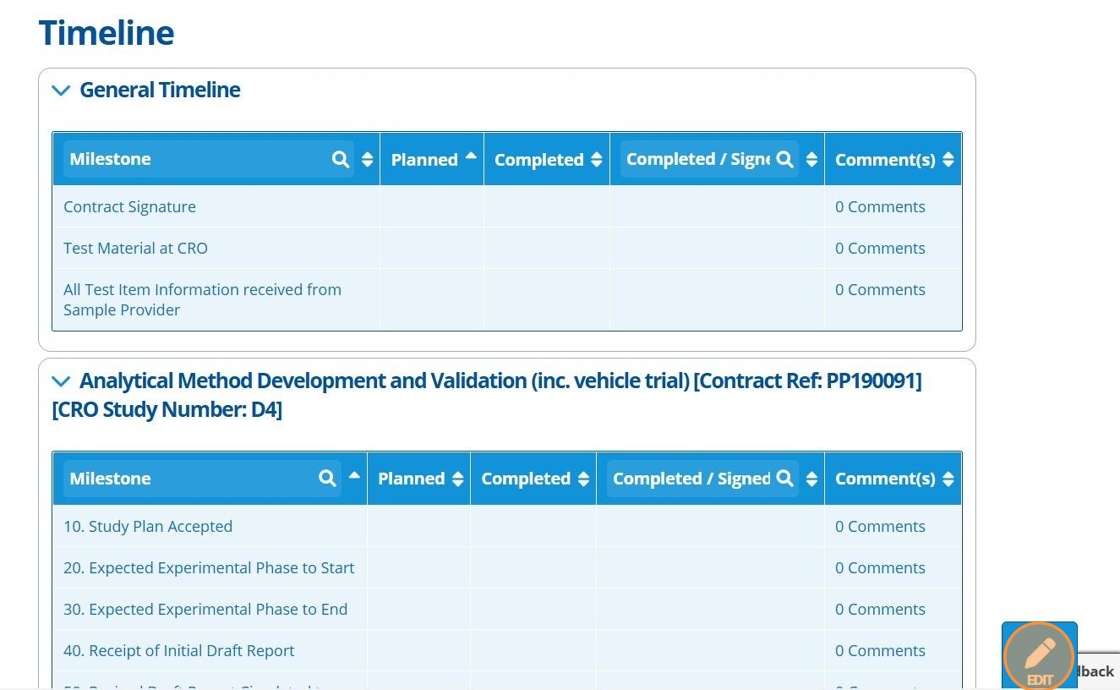
10. 👆 Click fields in the "Planned" column to populate the expected completion date for each milestone.
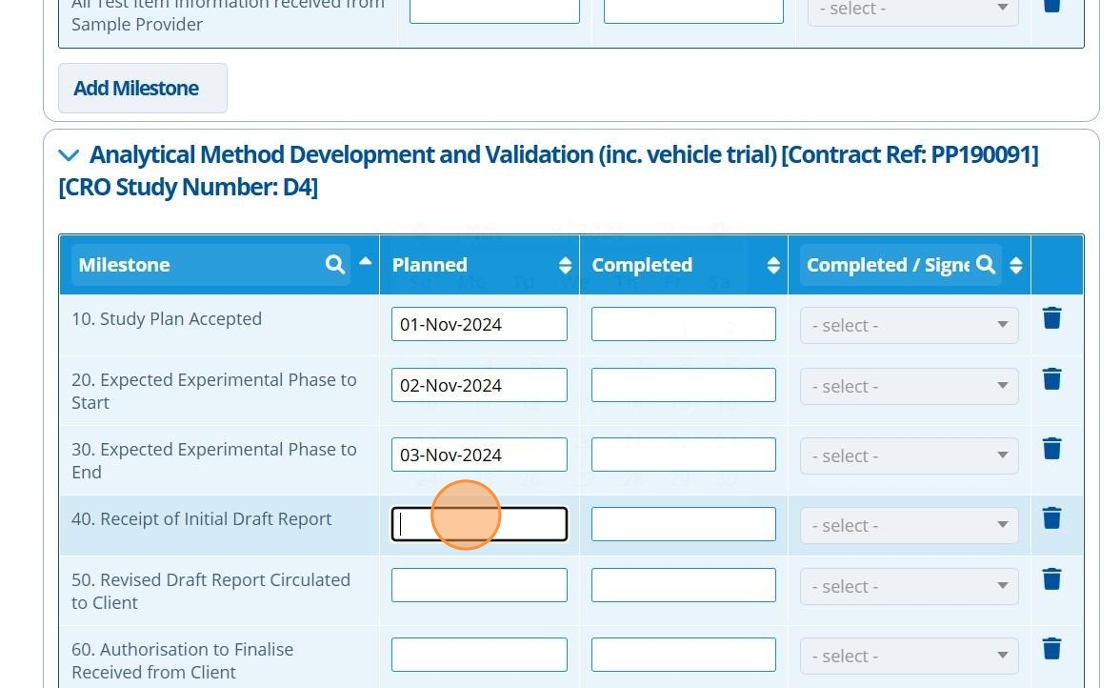
11. 👆 Use the "Add Milestone" button to add another milestone / line item into this timeline.
Note that this is creating a custom timeline event.
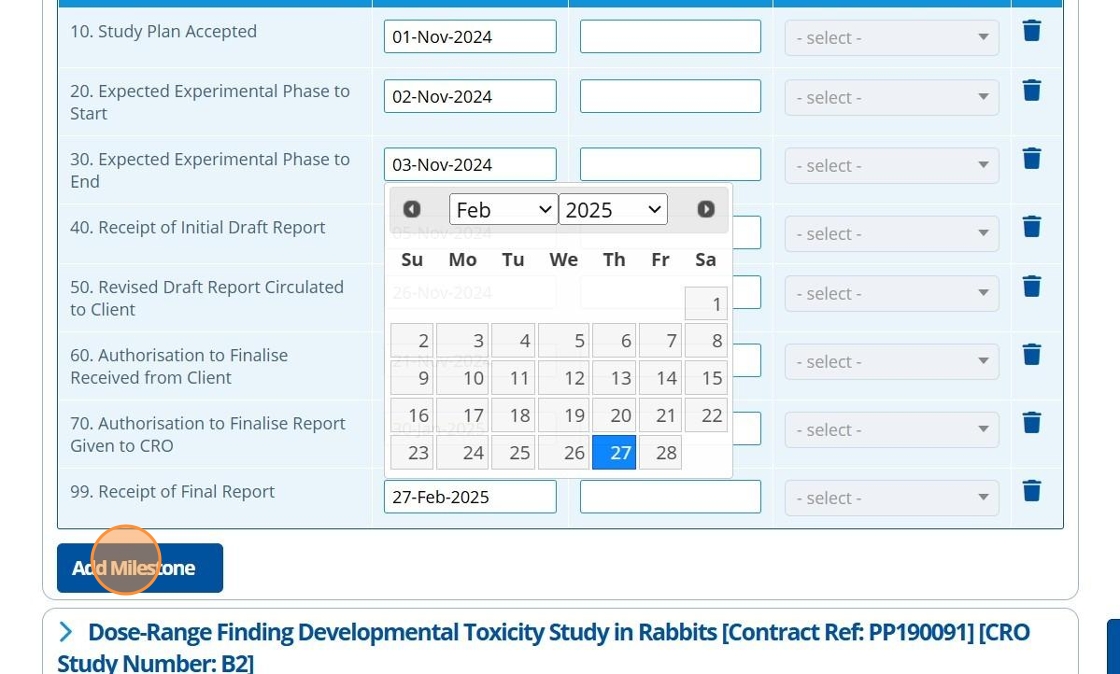
12. ✍️ Enter the milestone name and assign a planned date.
The milestones appear in the list in alphabetical order once saved.

13. If a milestone has already been completed, then ✍️ fill the date in the "Completed" column. This will autopopulate the "Completed / Signed by" column with the user who actioned this.
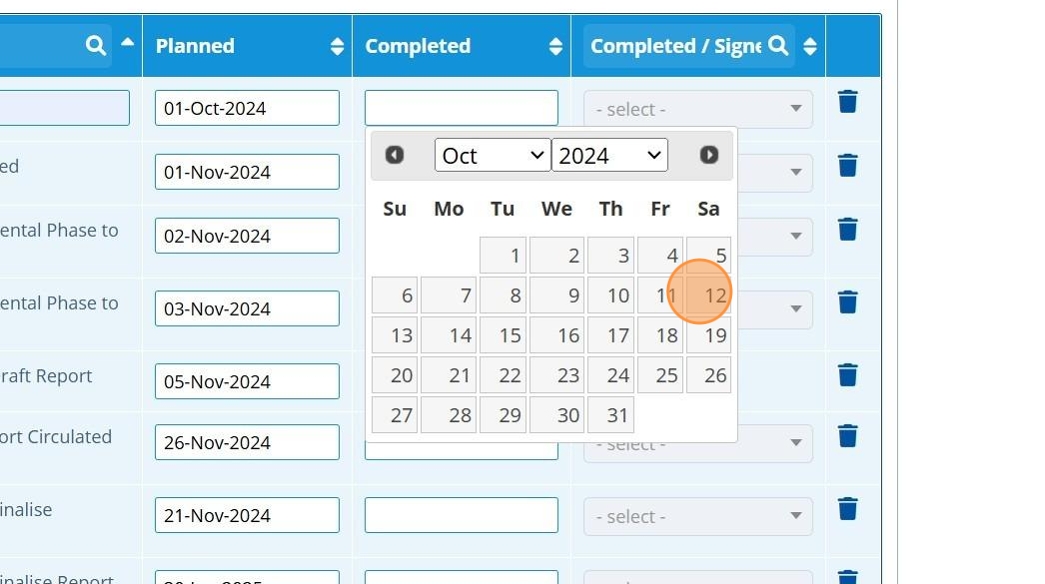
14. 👆 Click "SAVE".
Tip
Assign dates to the general timeline in the same way as the above steps.

15. 🥳 The study activities are created and the timeline is set up and populated ready for continued use.
When the "Planned" date has passed, the milestones will indicate if the activity is overdue or completed with warning icons or green ticks. Overdue activities send out notifications to users who have it enabled.
