How to Add a Contact to a Campaign
Tip
Contacts must be added to campaigns and assigned the relevant viewing role(s) in order to view and access restricted content.
If content is unrestricted then contacts need adding to the campaign, but do not need to have roles.
Content is unrestricted when the access type for a page is "Public", "All Users" or "All Contacts in this Campaign".
Contacts can be assigned to multiple campaigns in bulk - see the administration guide for more information. To assign contacts in bulk to a specific campaign, see this tutorial.
Warning
If a new contact does not log into their account for a certain number of days, then their account will automatically expire. It will need reactivating to be used. The number of days before expiry can be set in the configuration settings.
1. 👆 Navigate to Campaigns 👉 Select the campaign of interest from the list.

2. 👆 Click the "Contacts" tab 👉 Navigate to "Contacts".

3. 👆 Click "Add Contact" to navigate to the "Add Contact" screen.

Add an existing contact to a campaign
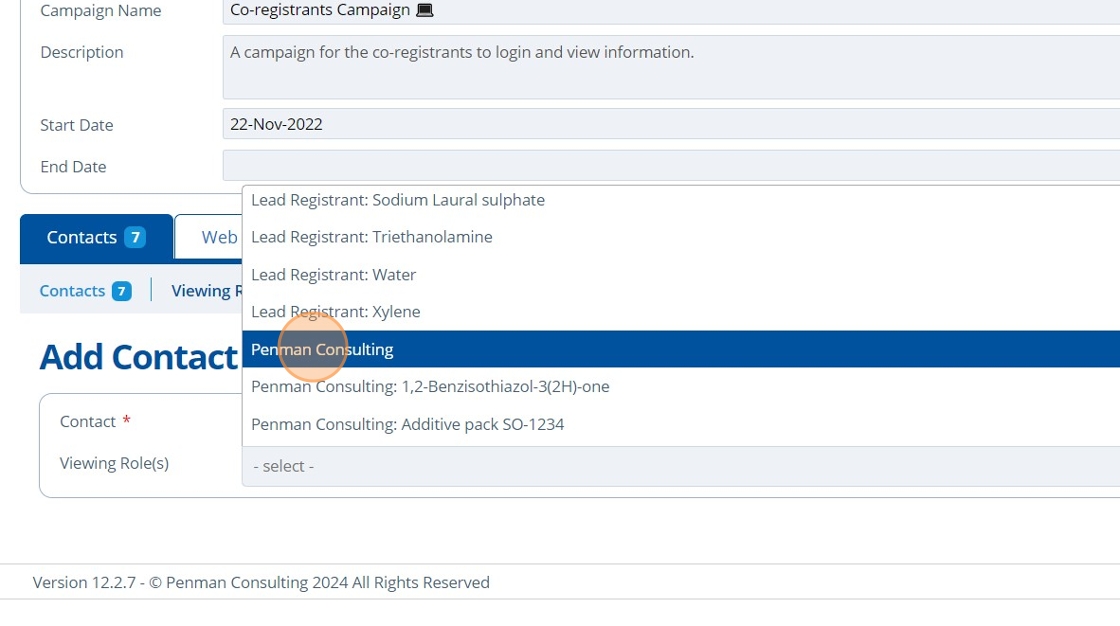
4. (If the contact already exists in the system) 👆 Click the "Contact" field and choose the required contact from the drop-down list.
If the contact does not yet exist, skip to step 8.

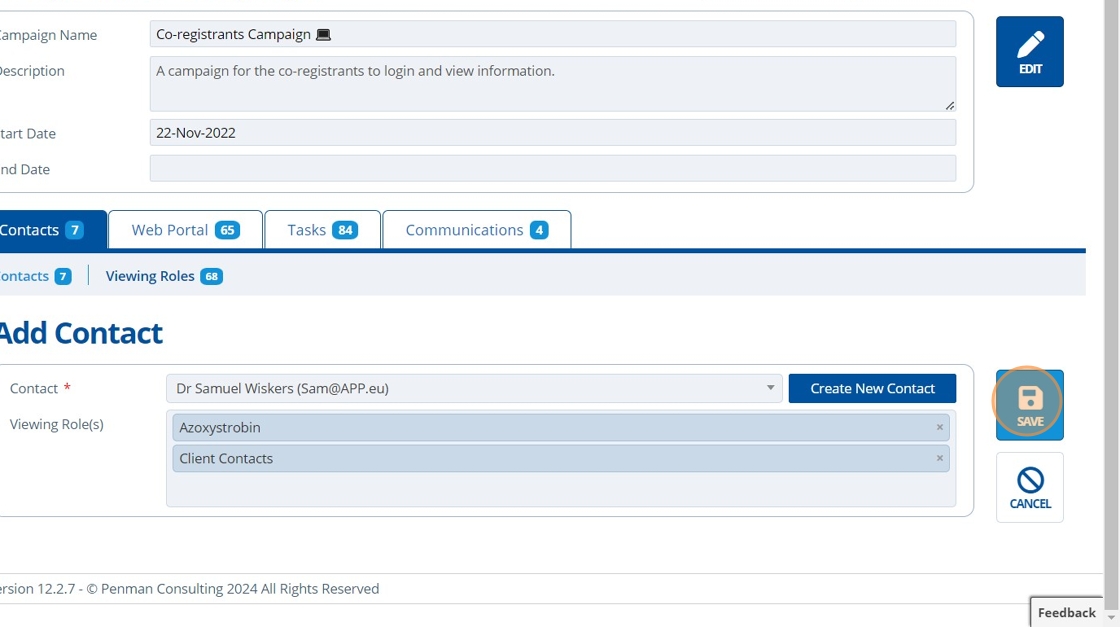
5. 👆 Select the "Viewing Role(s)" field and choose the required role(s) from the drop-down list.
The roles assigned to the contact will determine what they are able to see within the campaign.

6. 👆 Click "SAVE".

7. 🥳 The contact will now appear in the list of contacts.

Add a new contact to a campaign
8. 👆 Click "Create New Contact" on the "Add Contact" screen.

9. ✍️ Enter a First Name, Last Name and an Email Address as a minimum.

10. If the contact is associated with an entity, then 👆 click "Add Address", and 👆 choose the entity along with its relevant address from the drop-down fields.

11. 👆 Click "SAVE".

12. 👆 Select the "Viewing Role(s)" field and choose the required role(s) from the drop-down list.
The roles assigned to the contact will determine what they are able to see within the campaign.

13. 👆 Click "SAVE".

14. 🥳 The contact will now appear in the list of contacts.
