Generate Invoices
Tip
This tutorial shows how to automatically generate invoices using an integration with external financing software.
There are multiple ways to start the invoice creation process:
- To generate invoices based on study costs already in the system, navigate to the relevant cost overview screen 👉 "Create Invoices" button. See a list of all the study related cost overview screens here, with information on what each one shows.
- To generate invoices based on no existing information in the system, go to the partitions Invoices Overview 👉 "Create Invoices" button. Here the invoice form will be blank, ready to fill in manually.
- To generate invoices based on one of the following records, navigate to that records "Invoicing" tab 👉 "Create Invoices" button. The invoice form will be populated with the chosen record:
- Product
- Constituent
- Category Group
- Budget
- To generate invoices based on budget(s), navigate to:
- Budget 👉 Costs 👉 Cost Overview - This overview contains costs for this budget.
- Budget Cost Overview - This overview contains costs for all budgets in the partition.
This tutorial demonstrates how to generate invoices from the main Cost Overview screen.
Set Up
1. A prerequisite for generating invoices is that an integration must be set up. An integration establishes the connection between Active Steward and the finance software. Follow this tutorial and select the relevant option from the list to set up the integration. Contact support@activesteward.com for more help.
Note that only Administrators can set up integrations.
Filter Information
Tip
This tutorial uses cost, entity and constituent information from the partitions Cost Overview screen to generate invoices on.
Every cost overview screen has checkboxes and filters to narrow down the relevant items to generate invoices based on.
Note that study costs must be published to create invoices from them. To create and publish study costs, see this tutorial.
2. 👆 Navigate to Studies 👉 Cost Overview.

3. 👆 Optionally, select dates in the "From" and "To" fields to show only costs that are due during this timeframe.

4. 👆 Optionally, choose the type of costs to show.

Create Invoices
Warning
To create invoices, entities assigned to costs must have an external reference and registration number.
5. 👆 Click "Create Invoices" in the top right corner once the filters have been applied and the expected cost line items show in the table.

6. 👆 Select the relevant option to choose how to separate the invoices.

7. 👆 Click "Generate".

8. 👆 Ensure the integration set up in step 1, is chosen in the dropdown field.
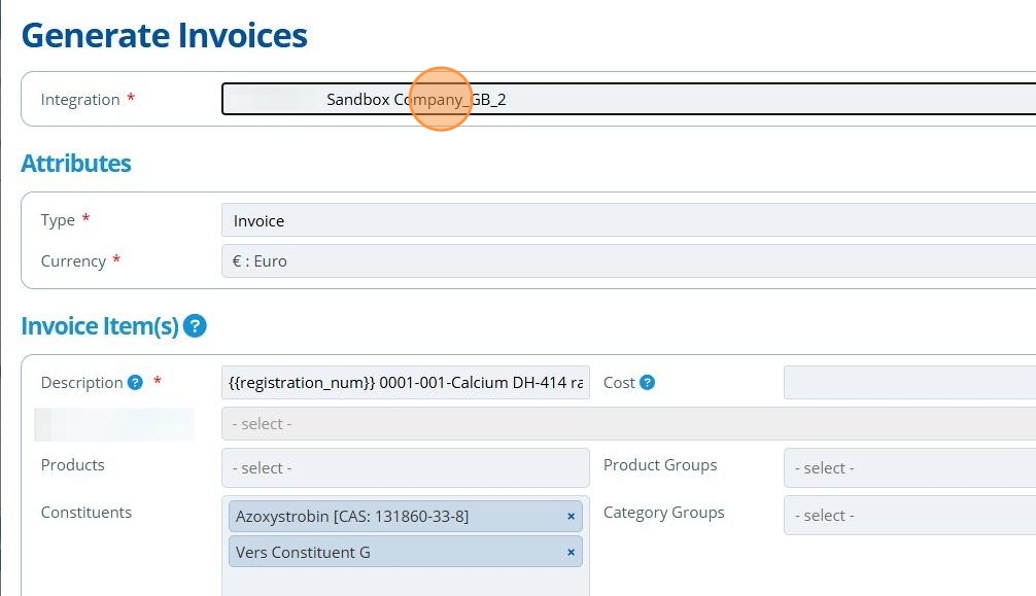
9. 👆 Choose if the types are to be Invoices or Credit Memos.

10. 👆 Choose the currency invoices will be generated in, in the "Currency" field.

Tip
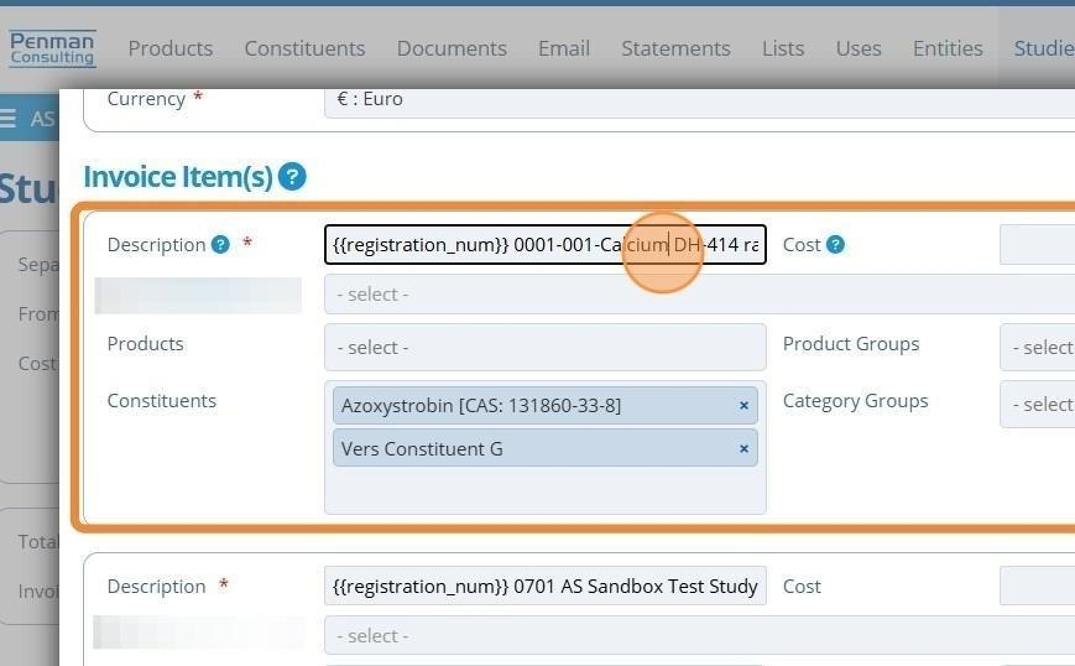
Each cost line item (in the cost overview screen) has a corresponding section here. They each represent a charge / line item that will appear on the invoice.
Fields for each invoice item can be autofilled (depending on the screen invoices are created from).
Tip
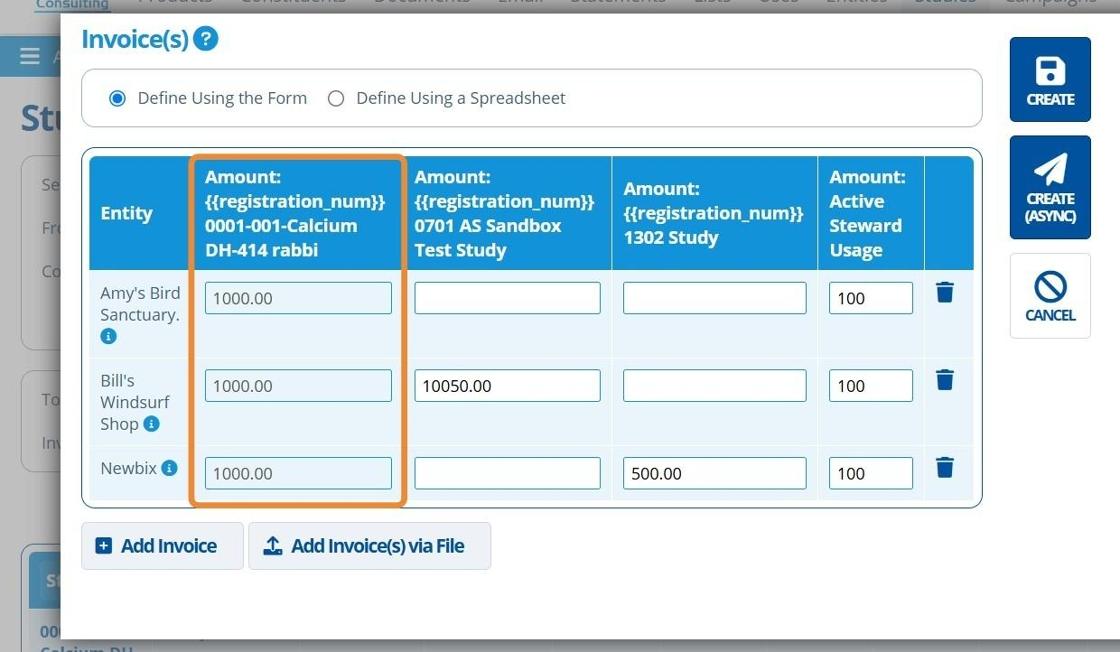
At the end of the screen there is a table for the Invoice(s). Each column represents a charge / line item that will appear in the invoice. The rows represent the entity(ies) invoice(s) are addressed to. The fields correspond to the cost for that line item, for that entity. If a field is left blank then that invoice item will not display on the invoice for that entity.

11. 👆 Click "Add Item" to create an additional invoice item. This creates another charge / line in the invoice.

12. ✍️ Fill in the information for the additional item.

13. ✍️ The additional invoice line item will be shown in the table near the end of the page. The amounts for each company can be set by populating the fields. Here, each company is charged 100 for the item "Active Steward usage".

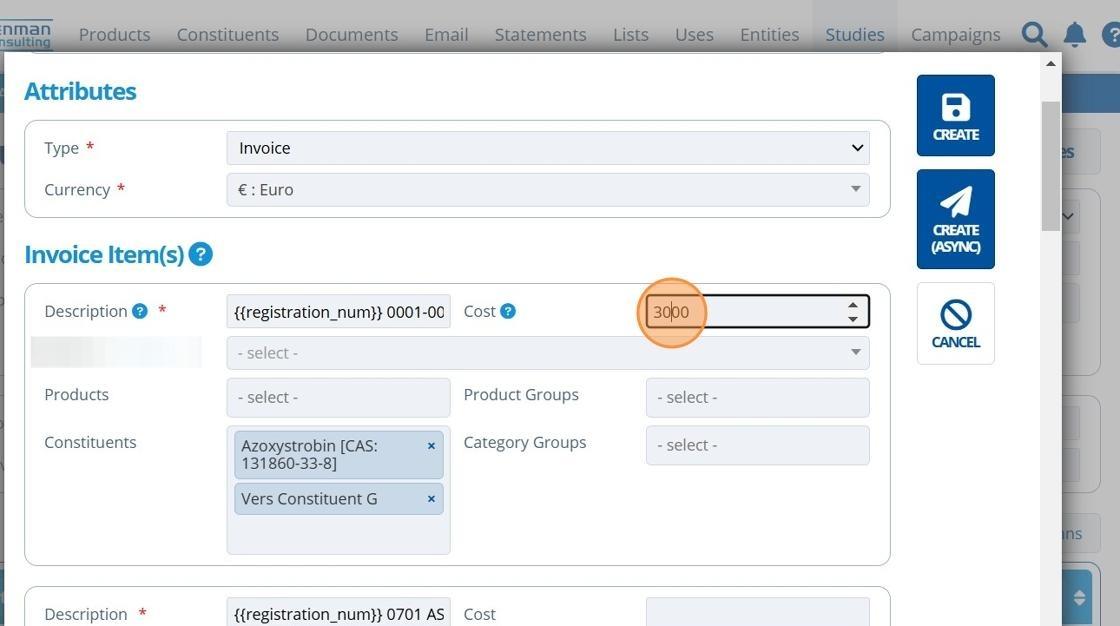
14. ✍️ Enter an amount into the "Cost" field to change the amount being charged for this invoice line item. The cost will be split evenly between each company that is being invoiced.
Tip
See that the cost is split equally, 3 ways.
Tip
👆 Click "Define Using a Spreadsheet" field to directly upload invoice item information rather than using the form table provided.

15. 👆 Click "Add Invoice" to generate another invoice.

16. 👆 Select the entity the invoice is for.

17. ✍️ Fill in costs for each line item in the table.

18. 👆 Click "CREATE" once the form is complete.
The information in this form will be sent to the financing software. The software will use a predefined template and use information provided in this form to generate a document. The document will be sent back and saved in the Active Steward system.

Tip
The "CREATE (ASYNC)" button also creates invoices (like the above button), but this one does not wait for confirmation. This option is usually used when generating a large number of invoices which will take longer.
19. 🥳 See that for company "Amy's Bird Sanctuary", an invoice can now be found tagged to this entity's record. It can also be found in the document search.

Tip
The "From" entity assigned to generated invoices is the one selected in the Partition Configuration settings.
20. 🥳 See that for company "Newbix" an invoice can now be found tagged to this entity's record. It can also be found in the document search.

Tip
🥳 Here is a preview of the Newbix invoice created. See the 3 invoiced items that were populated in the form (step 15).

Tip
Follow this tutorial to learn how to send the above generated invoices to company contacts.