Create Payment Schedule and Publish Costs
Tip
Payment Schedules keep track of expected invoice amounts and dates. They also define how the overall cost of a study is broken down. Costs are split into the following sections:
- Study Payment Schedule(s) - There is a study payment schedule for each defined Study Activity from the Labatory / CRO tab.
- Other Costs
- Management Costs
The Payment Schedule tab is split into 3 sections; for "Planned", "Actual" and "Published" costs. "Planned" costs are usually an estimate and are filled out before the study commences. "Actual" costs are completed in line with receipt of a signed contract. Both "Planned" and "Actual" costs can be "Published". "Published" costs cascade throughout the system, to be used in other areas of Active Steward, such as cost overviews and campaign pages.
When study costs are not "Published", the Study Manager will receive daily notifications if they have notifications enabled for this study record or for all study records.
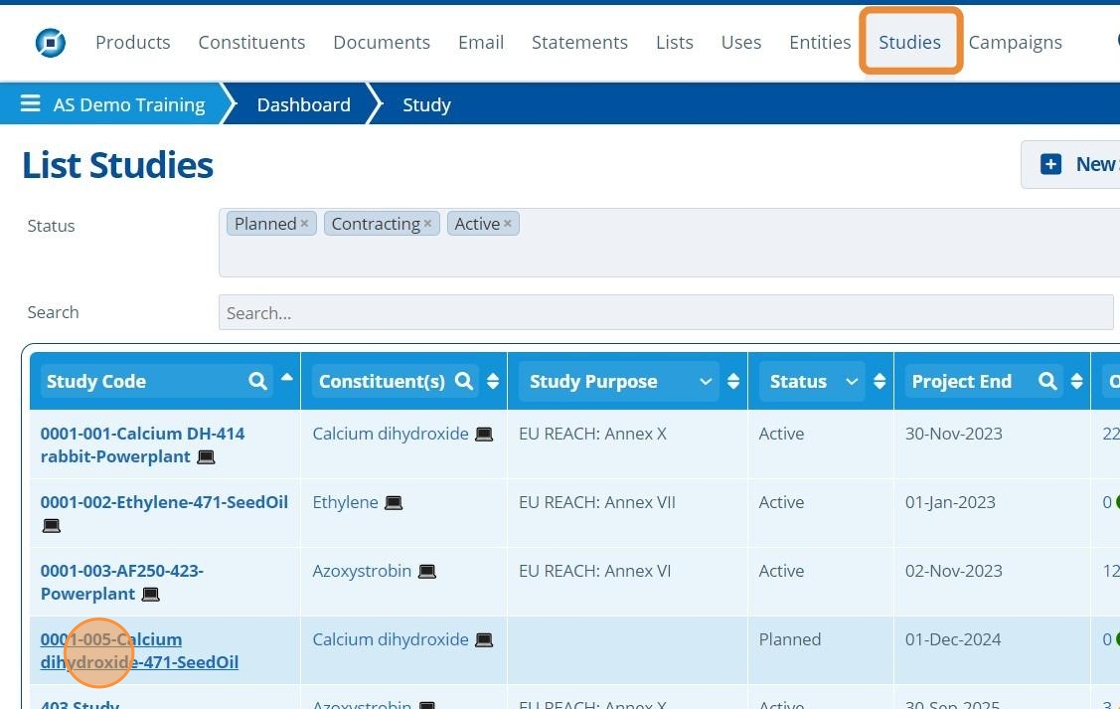
1. 👆 Navigate to Studies 👉 Click the study of interest from the list.
2. 👆 Navigate to the Costs & Invoicing tab 👉 Payment Schedule.
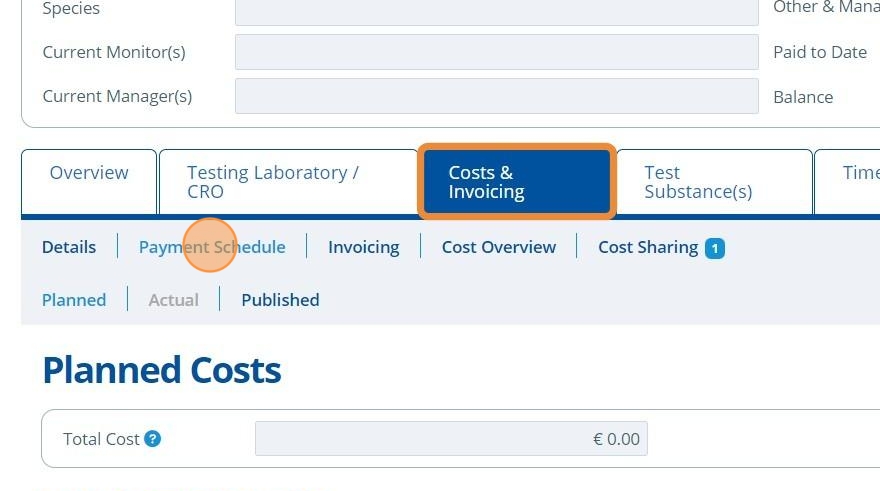
Planned Costs
Tip
Planned Costs are usually an estimate based on the type of study being done and by which facility.
Warning
Planned Costs cannot be edited unless the study status is set as "Planned".
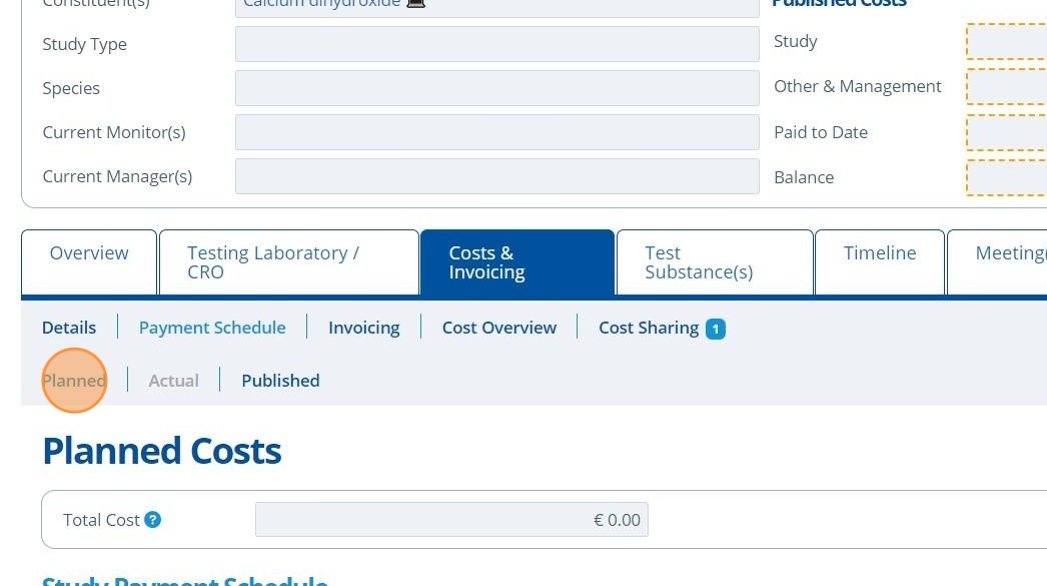
3. 👆 Navigate to Planned.
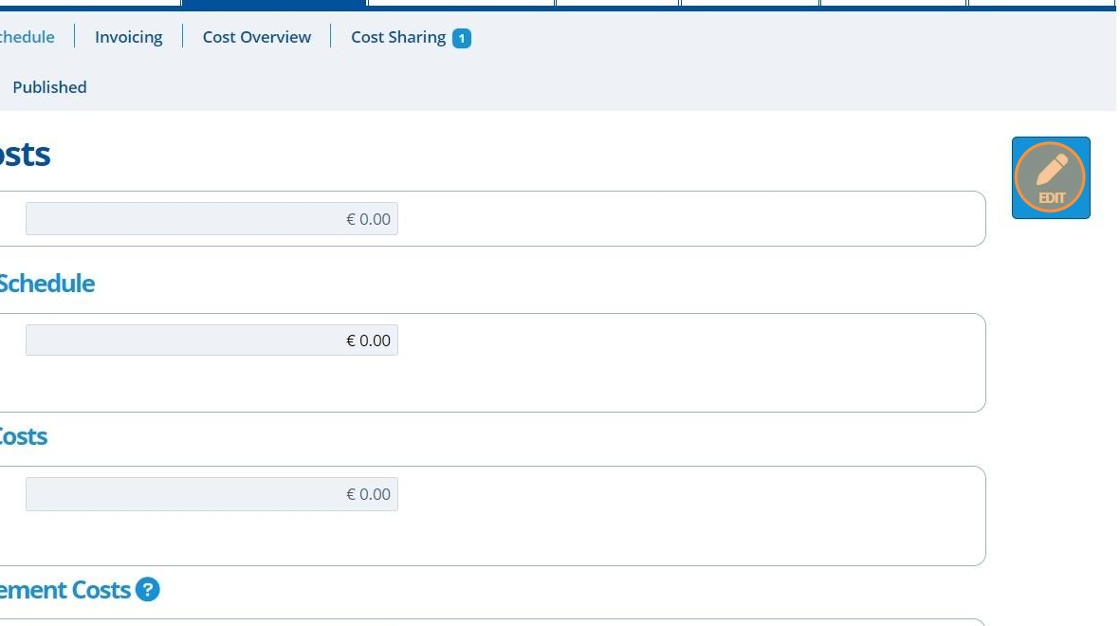
4. 👆 Click "EDIT".
5. ✍️ Fill in the "Planned Cost" field. This field needs filling in first as it is used to calculate the payment milestones below it.
This field represents the total cost a CRO/lab may charge for a study. Payments to the lab are not usually paid in one sum, so are broken into parts, each paid at different stages of the study. The payments are set up in more detail on the "Actual" and "Published" cost tabs.

Tip
The currency of the costs on this page is set in the "Payment Details" tab.
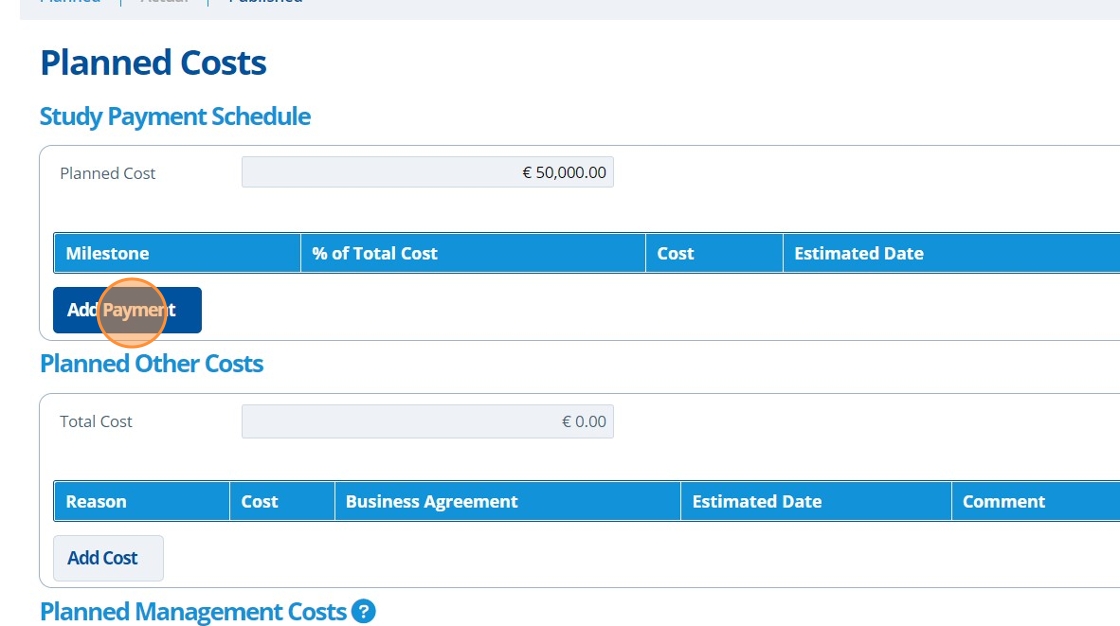
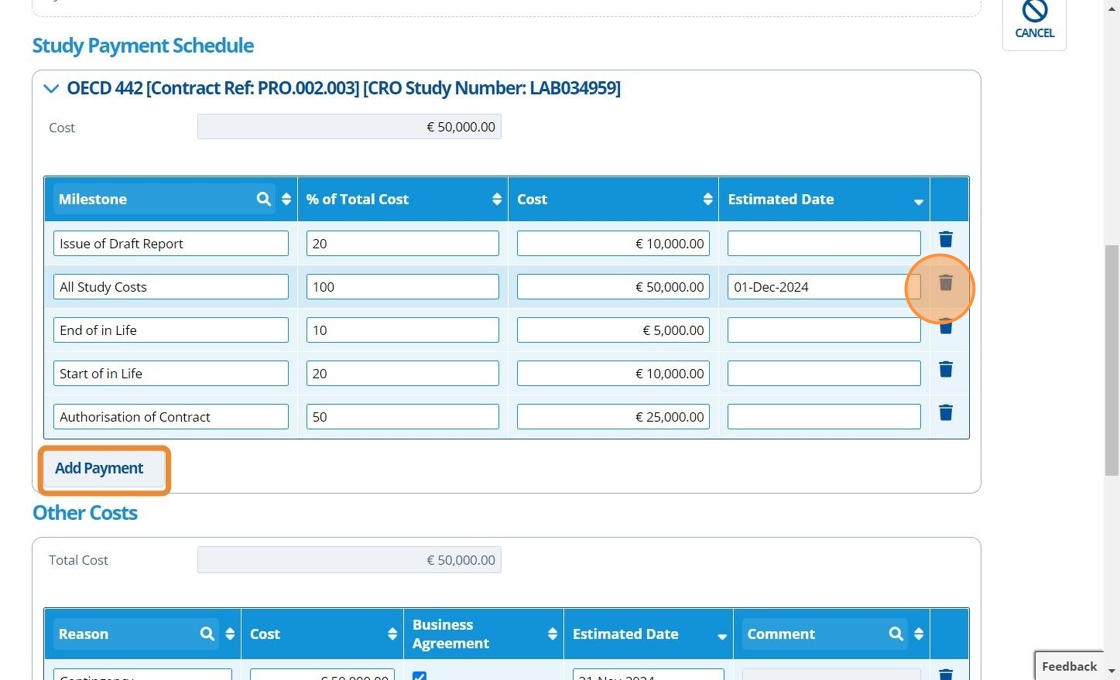
6. 👆 Click "Add Payment" to create a new milestone.
Each milestone represents a separate payment. All milestones will make up the full "Planned Cost" input in the prior step. When the study is at the "Planned" stage it can be hard to estimate costs and dates, so usually one milestone is added for "All Costs" as a placeholder.
7. ✍️ Enter a milestone name and fill in the percentage of the "Planned Cost" that this milestone will make up.
Since there is only one milestone here in planned so far, it will be 100%.

Tip
Once the percentage column is populated, the cost column will be auto calculated.

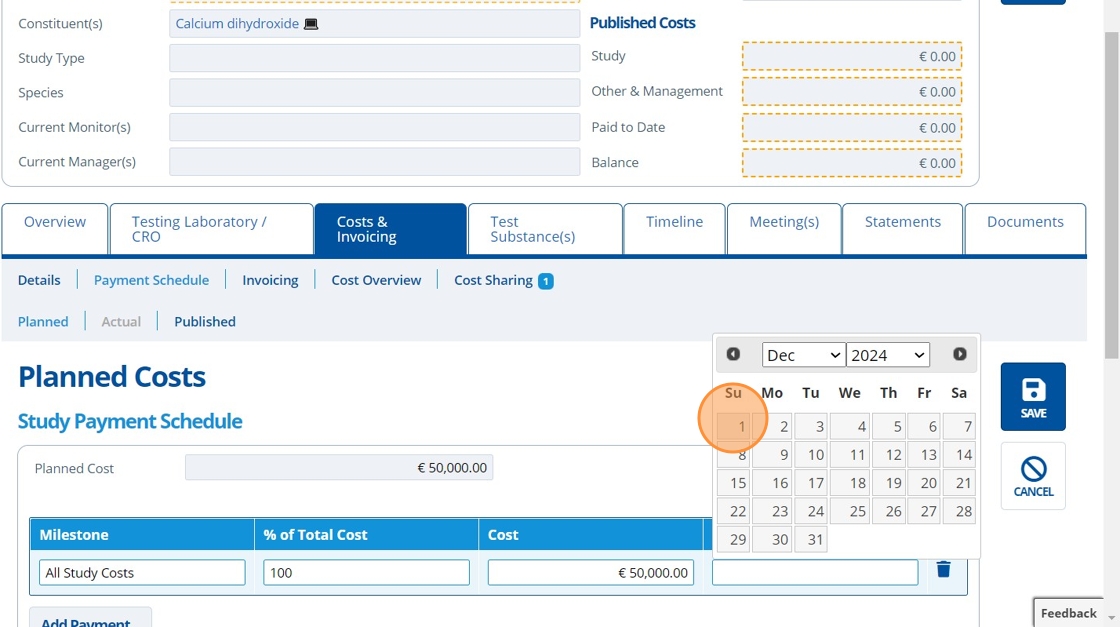
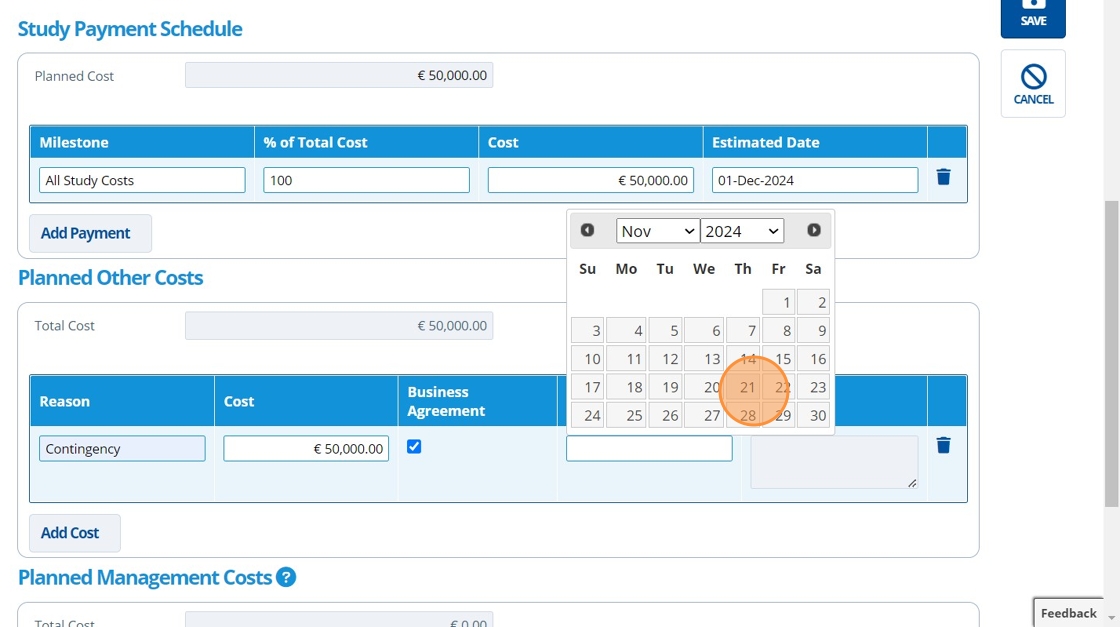
8. 👆 Select the date the payment is expected to be received.
At the planned stage this is likely unknown, so select an estimated date.
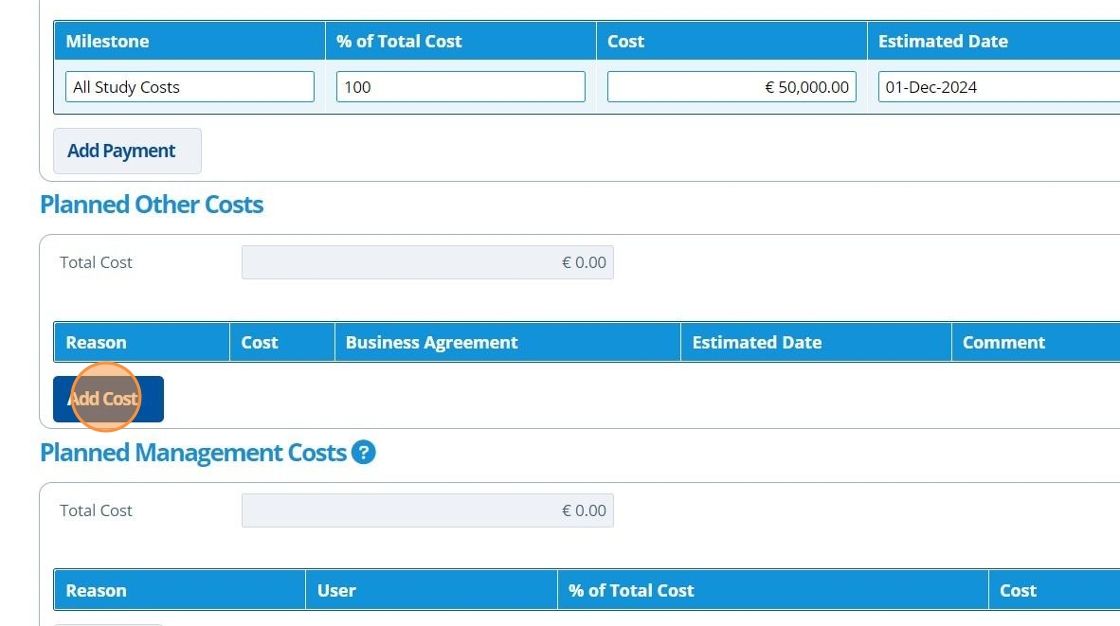
9. 👆 Click "Add Cost" in the "Planned Other Costs" section.
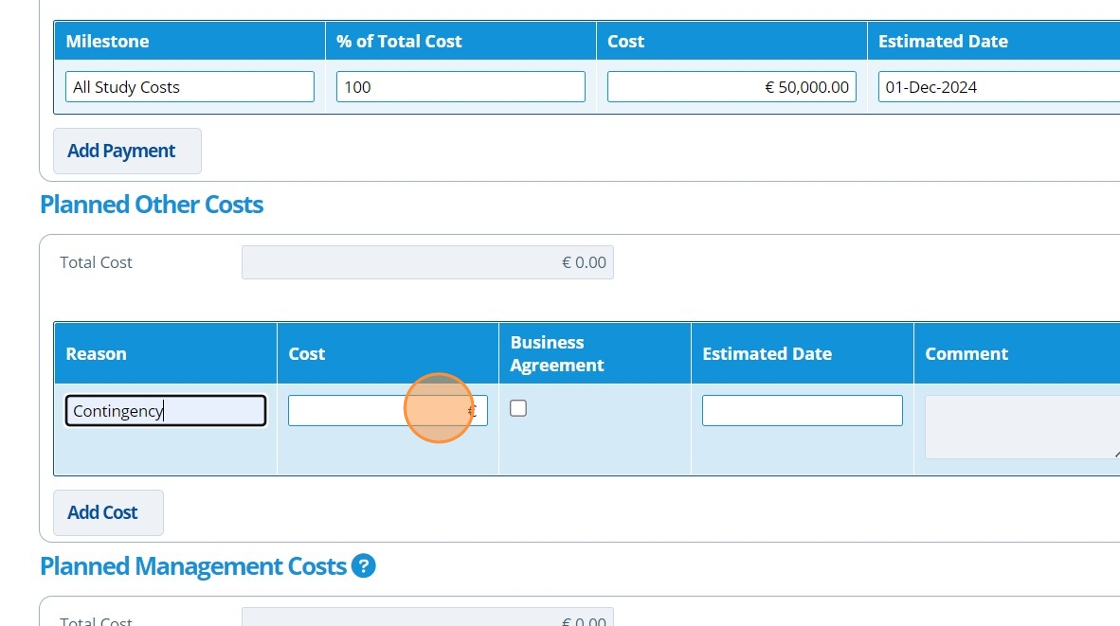
10. ✍️ Enter the name of the cost and the amount.
This is usually a "Contingency" cost that allows for additional testing or unforeseen issues during the study. This is usually 10% of the total cost.
Tip
If the contingency cost is provided within the business proposal, then tick the checkbox.

11. 👆 Choose an expected date.
A contingency cost will usually be charged at the end of the study after everything is finalised.
12. 👆 Click "Add Cost" in the "Planned Management Costs" section.
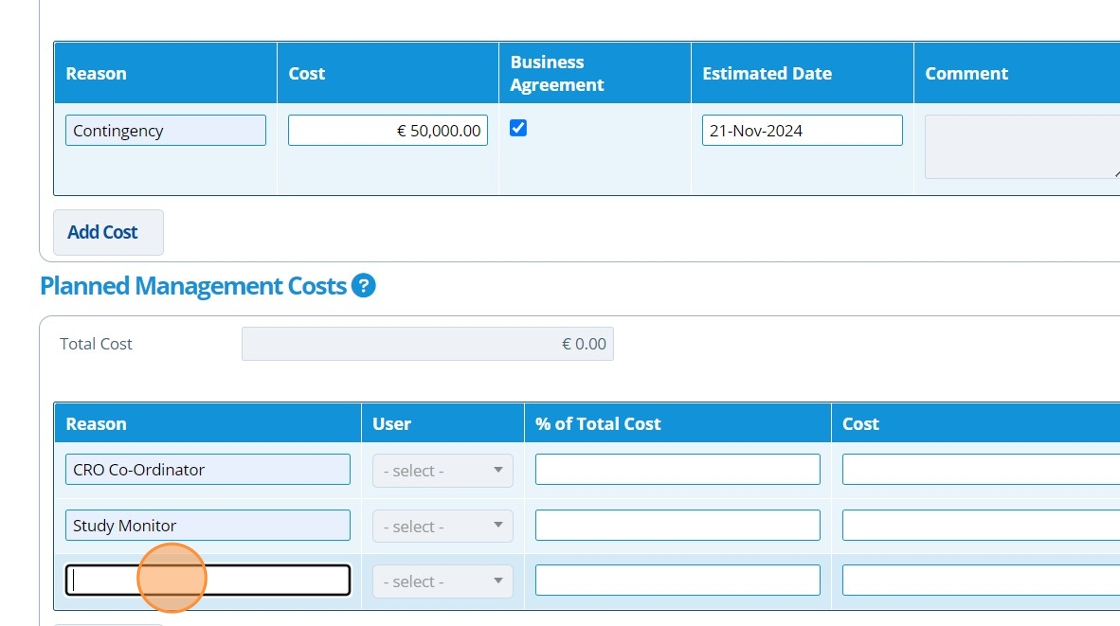
These are costs charged to the client for our services. The services are usually Study Manager, Monitor and CRO co-ordinator.

13. ✍️ Enter the name of the costs into the "Reason" column.
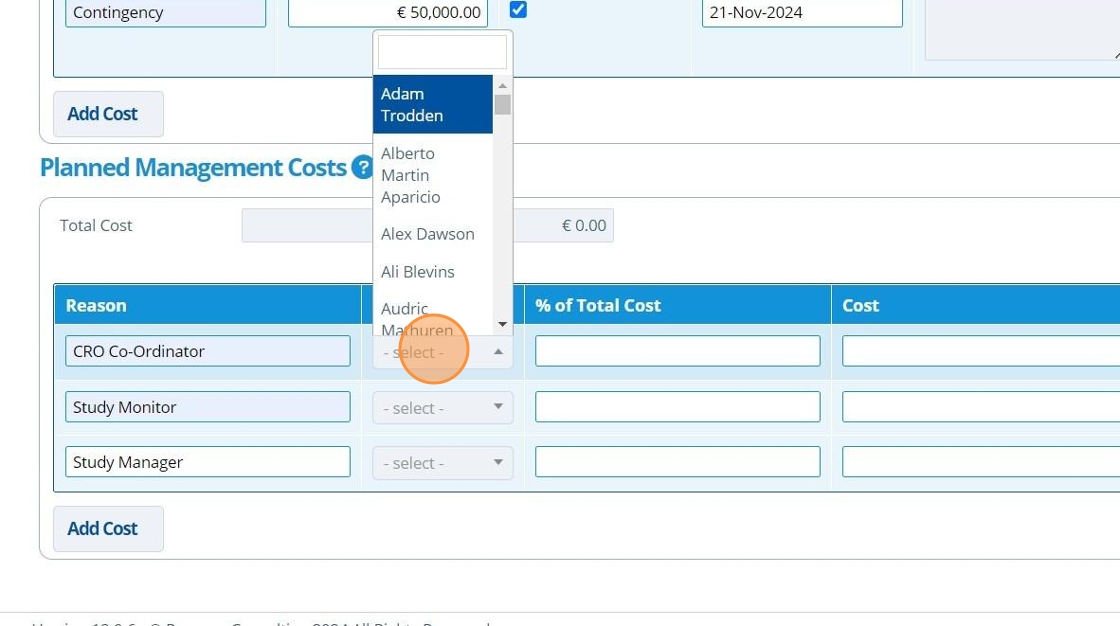
14. 👆 Choose a user to assign to each Reason by clicking the drop-down field and selecting an option.
Note that the user must already exist in the system for them to be assigned here (How to Create a User). At the planned stage of the study the monitor can be unknown - if this is the case there are "TBA" options in the list.
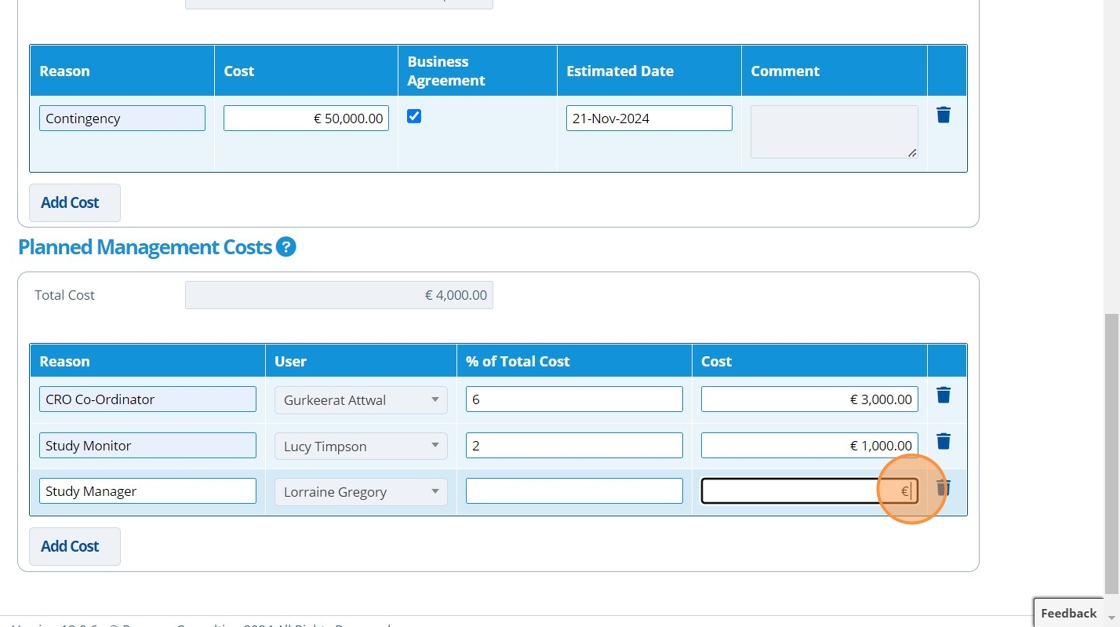
15. ✍️ Enter amounts for each of the milestones into the "Cost" column if the costs are fixed.
The "% of Total Cost" column will be automatically calculated.
16. 👆 Click "SAVE" after all planned costs are populated.
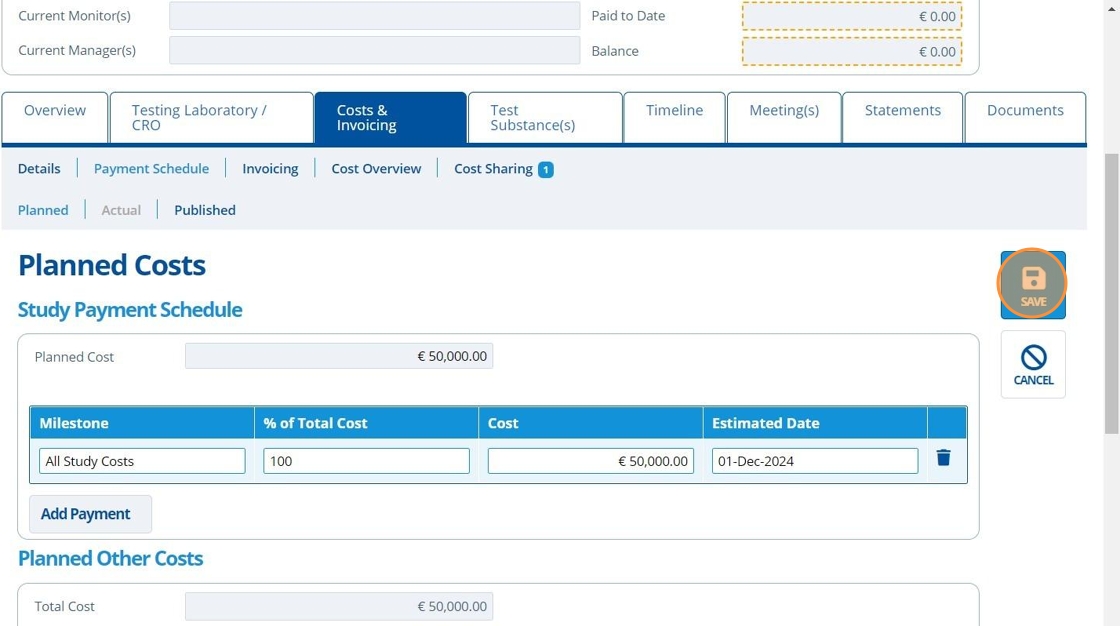
17. 🥳 See at the top of the page an overall total has been calculated.

Actual Costs
Tip
Ensure the study has "Activities" populated in the "Testing Laboratory / CRO" tab. This is so costs can be allocated against each study activity (How to Create Study Activities and Set up the Timeline).

18. 👆 Navigate to the "Actual" tab.
See that there will be an expandable separate "Study Payment Schedule" created for each "Study Activity".

Tip
The planned schedule will be copied to the actual schedule when the study becomes active.
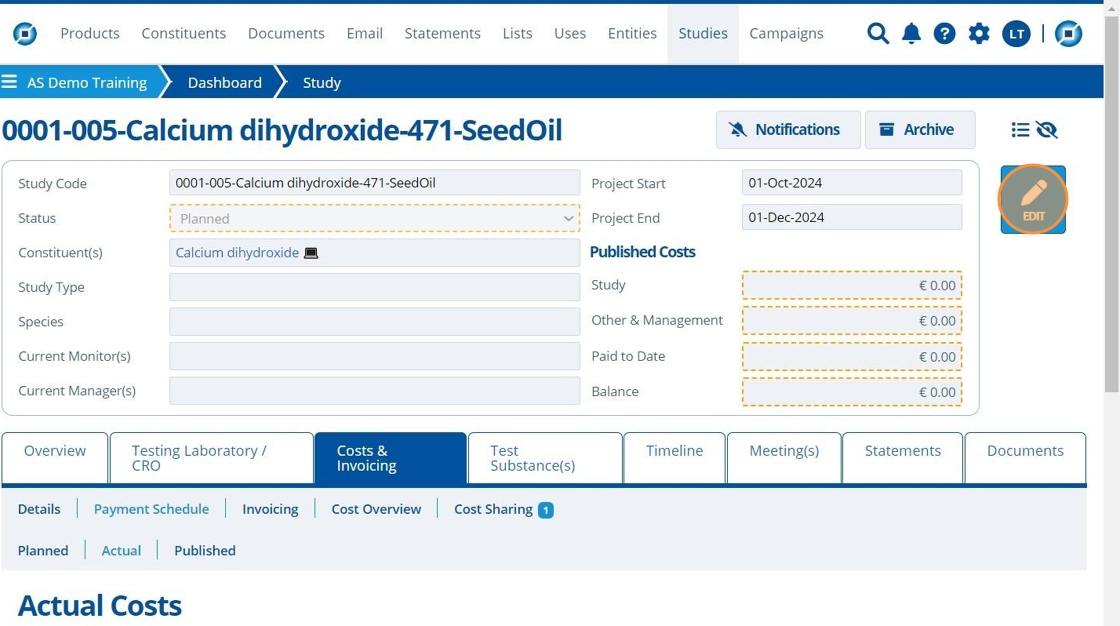
19. 👆 Click "EDIT" in the study record header.
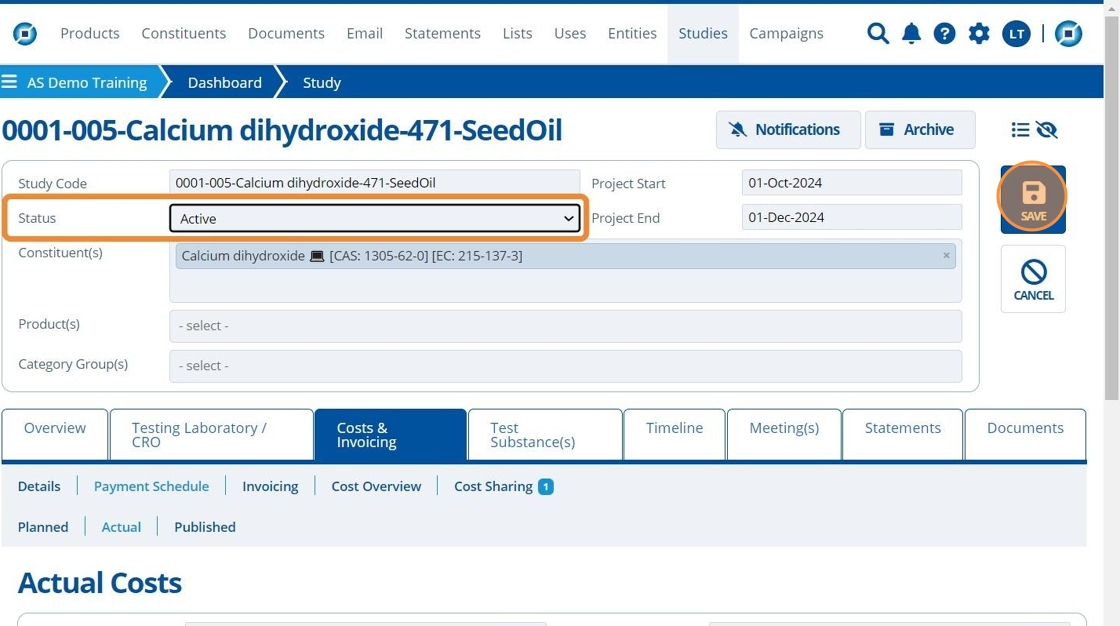
20. 👆 Change the Status to "Active" 👉 Click "SAVE".
21. 👆 Click "EDIT" to amend the costs further.
Now that the study is "Active" it is likely that the user has more information on the actual costs and estimated invoice dates - this information may be outlined in contracts received from the CRO.
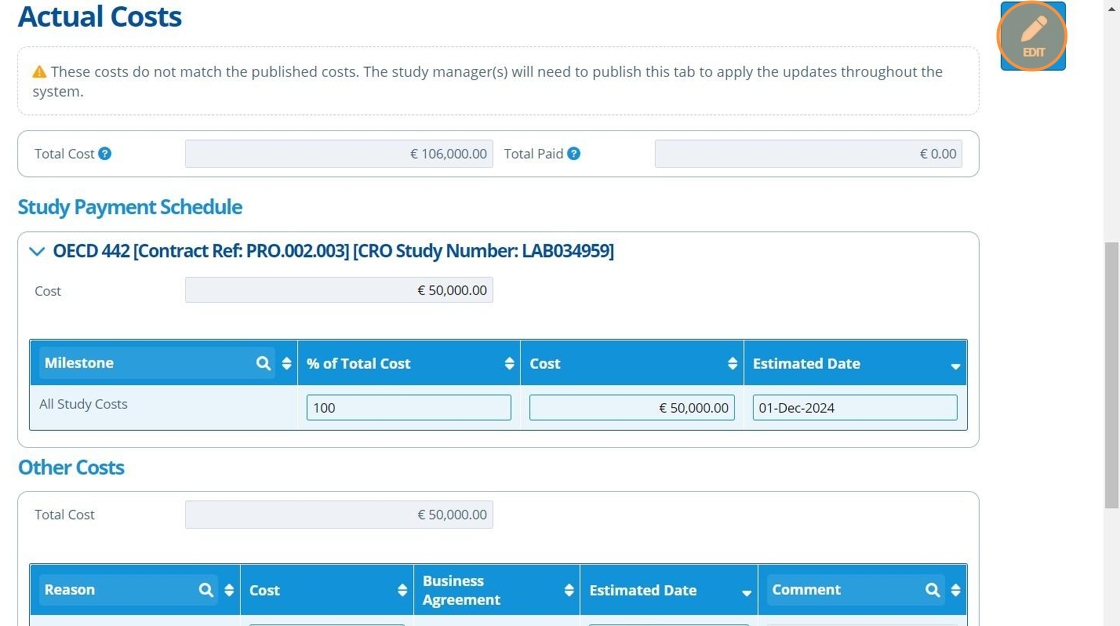
22. 👆 Update and create milestones to represent a more accurate cost schedule showing details on how costs are split.
Each milestone represents an invoice the CRO will send. Examples of how costs may be split:
- Upon signature of contract
- Study start
- Study end
- When the draft report is received
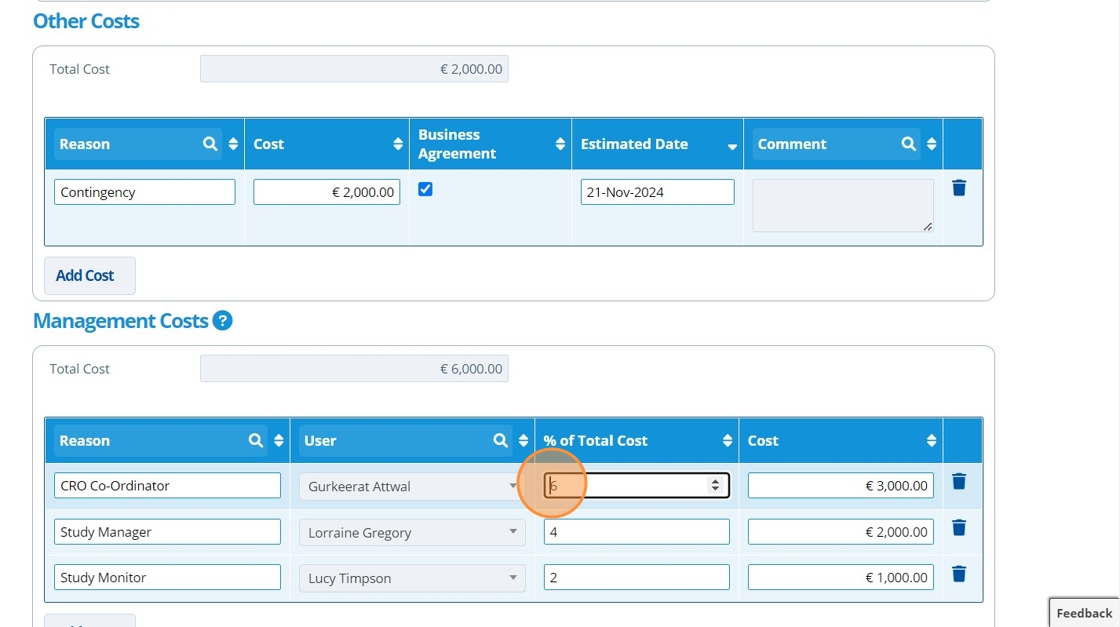
23. ✍️ Amend the "Management Costs" milestone payments if required.
If "TBA" options were selected in step 14, then assign the relevant users.
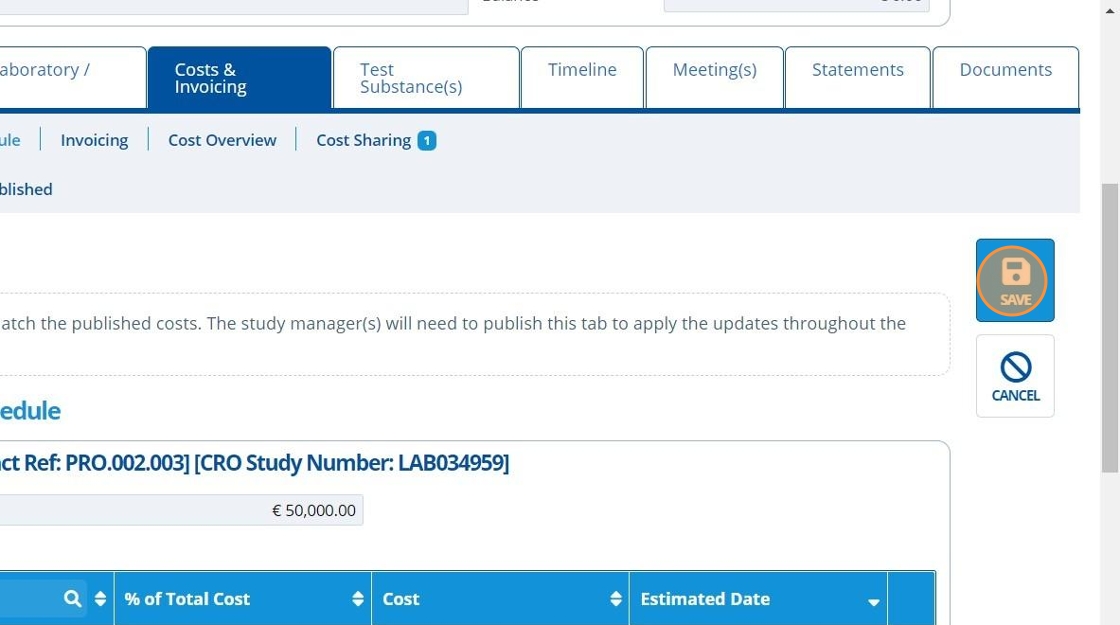
24. 👆 Click "SAVE".
25. 🥳 See that the total of all costs are shown at the top of the page.
There is also a "Total Paid" column to keep track of the payment completeness. This field is updated when invoices against the study are populated in the system, and are marked as "Paid".

Published Costs
Tip
Publishing costs means that the costs and payment schedule for a study is finalised. Once costs are published it releases the information to be used in various other areas of Active Steward. Only the study manager is able to publish costs.
26. 👆 Click "PUBLISH".
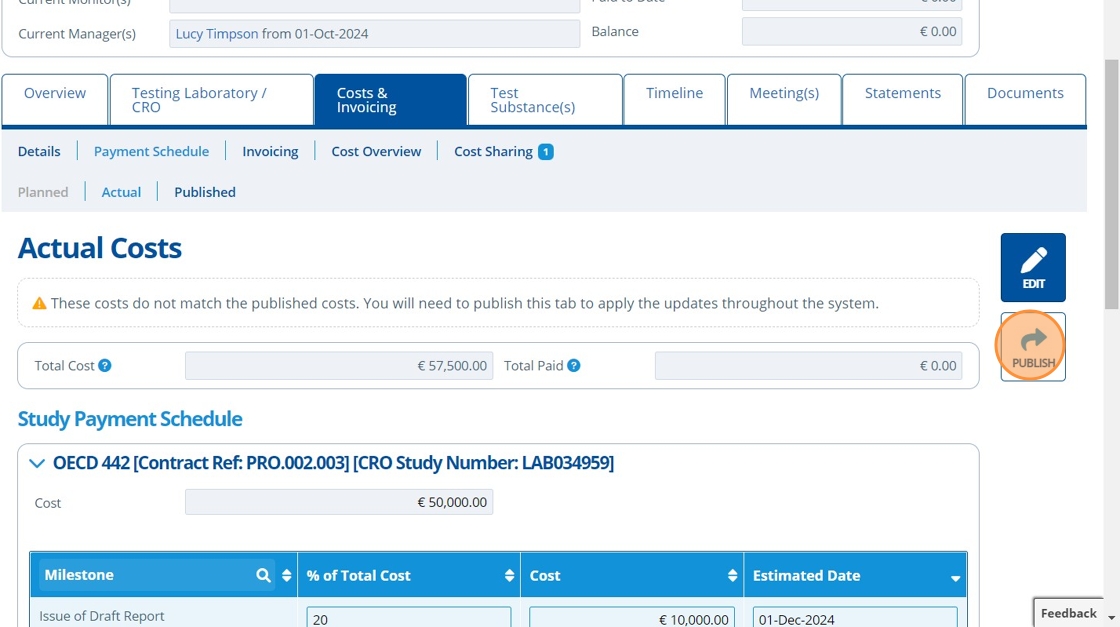
27. 🥳 Costs now appear summarised in the study record header, and are published throughout the system.
Areas in Active Steward that depend on published costs;
- Cost Overviews - see the study management guide for more information.
- Costs can be shown on campaign study pages (How to Create a Studies Page).
- Generating Invoices.
