How to Create a IUCLID Review Task
Tip
A "IUCLID Review Task" is used to share IUCLID files with users. The clients can review the document via Active Stewards "IUCLID Viewer" where they can leave comments. One IUCLID file can be added, or two can be added for comparison purposes. Here is a preview of a IUCLID Review Task on a campaign page.

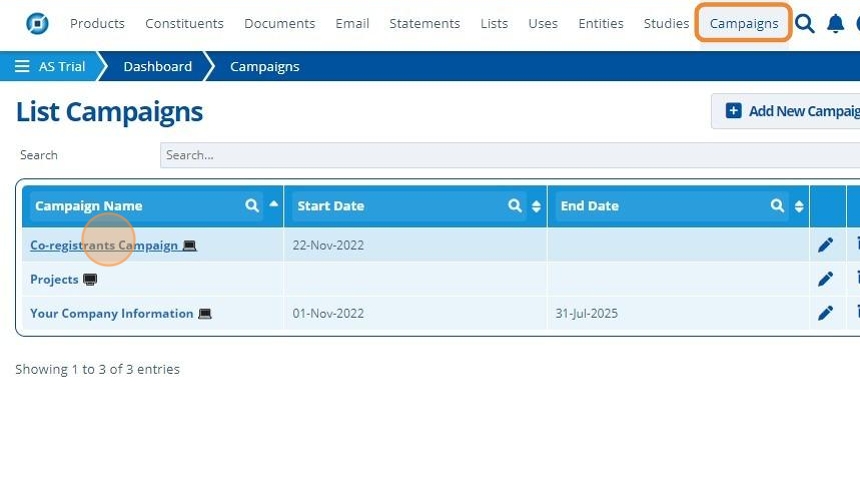
1. 👆 Navigate to Campaigns 👉 Select the campaign of interest from the list.

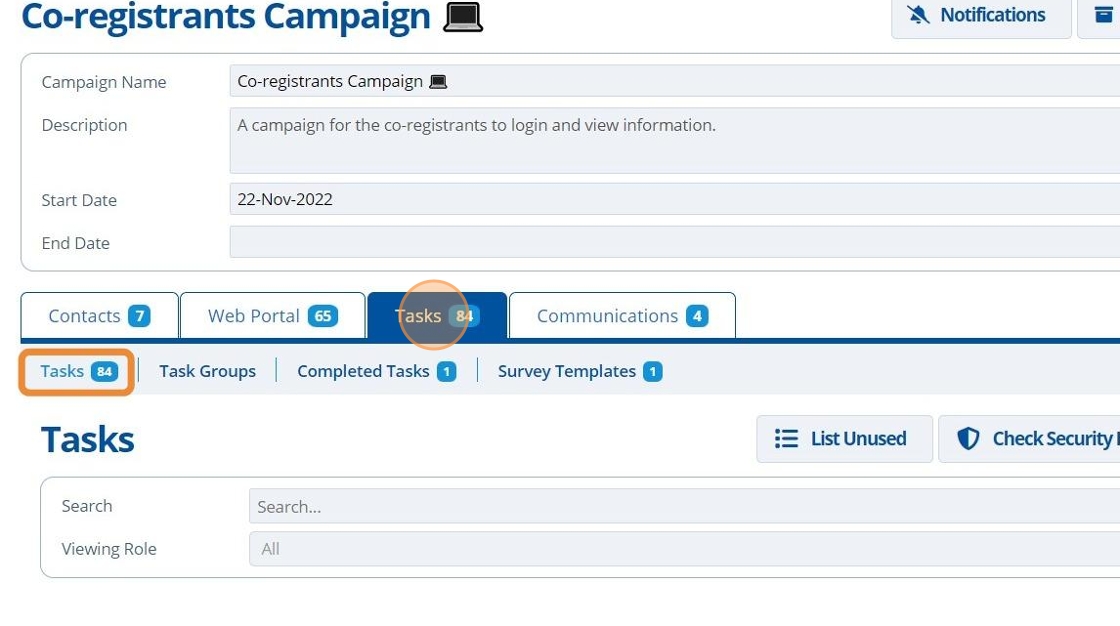
2. 👆 Click the "Tasks" tab 👉 Navigate to "Tasks".

3. 👆 Click "Add Task".

4. 👆 Select an option in the "Viewing Role" field. This will control who can access and use the task.
Your user account will need permission to set access to "Public" or "All Users".

5. ✍️ Enter the task name and 👆 choose "IUCLID Review" from the "Type" dropdown.

6. 👆 Click the "Select Document" button to choose the IUCLID file to assign to this task.

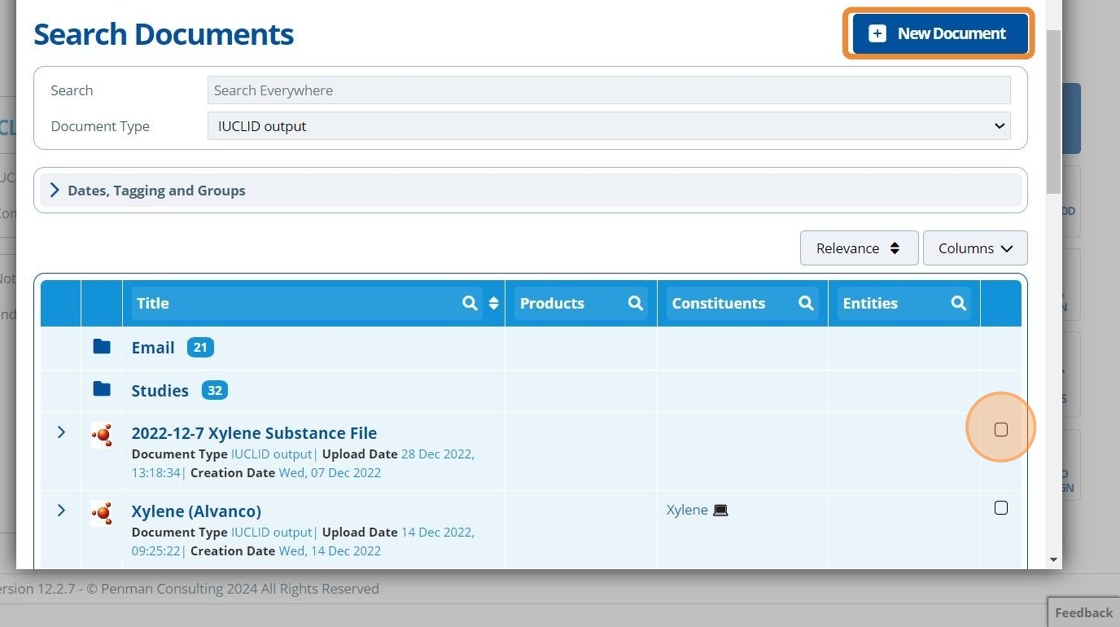
7. 👆 Click "New Document" if the IUCLID file is not yet in the system and 📤 upload a file. If the IUCLID file already exists in the database, then 👆 select the checkbox for the relevant file in the table.

8. 👆 Click "Select".

Review One IUCLID file
9. 👆 If only one IUCLID file is required for the review task, then leave the "Compare To" option set to "None".

Review / Compare Two IUCLID files
10. After selecting the "IUCLID Document";
👆 Choose the option "Other Version" to compare this IUCLID file to a previous version of the same file. "Other Version" will only be visible if the current selected document has other versions that exist in the database.
👆 Choose option "Other IUCLID document" to compare the current selected document to another IUCLID document. Note that to compare to another IUCLID file, both files must have the same UUID.

11. After choosing a "Compare To" option, another "Select Document" button will appear. 👆 Click this button to select the second file.

12. 👆 Select the checkbox for the relevant file in the table.

13. 👆 Click "Select".

14. There are now two IUCLID documents assigned to this task - 👆 Click "SAVE & RETURN".

15. 🥳 After clicking "SAVE & RETURN", the new task can be found in the tasks list. It can now be added to a Task Group or inserted onto a campaign page.
