Automatically Link Entities to Study
Tip
Automatically linking entities to a study can be done on study set up, and/or after study creation.
See steps 21-44 to see how category groups can be used to link entities to studies.
Entities that get automatically linked are:
- Entities that are actively linked to the study's constituent and have a study related entity role
- (Optionally) Entity links that also have a relevant "Reason for Interest"
Entity roles are assigned upon creation of constituent-entity links. The study related roles are "Registrant" and "Only Representative". When these roles are assigned, a "Reason for Interest" can then be given to the constituent-entity link.
- See Manually Link Entities to Studies to learn how to manually link entities. This is useful when linking entities with non study related roles.
- See Use Study Groups to learn how to link entities by inheriting from a study group.
- See Assign an Entity to Pay Shares Towards a Study as an example.
Automatically Link Entities
Link at Study Creation
Link Entities with Study Related Roles
1. 👆 Create a new study 👉 Select the constituent that the study is for.
The entities that potentially get linked are only those linked to the constituent(s) selected in this field.

2. 👆 Select the "Automatic" option, and ensure that "Link Only Entities Based on Their 'Reason for Interest'" and "Link via Category(ies)" is unchecked.

3. 👆 Click "SAVE" to create the study.

Tip
If there are no relevant constituent-entity links for the system to use, then the "Client Entity" from the Configuration settings will be linked by default.

4. 👆 Navigate to "Costs & Invoicing" 👉 "Cost Sharing" 👉 "Entities" to view the linked entities.

5. 🥳 See that 4 entities have been linked to the study record.

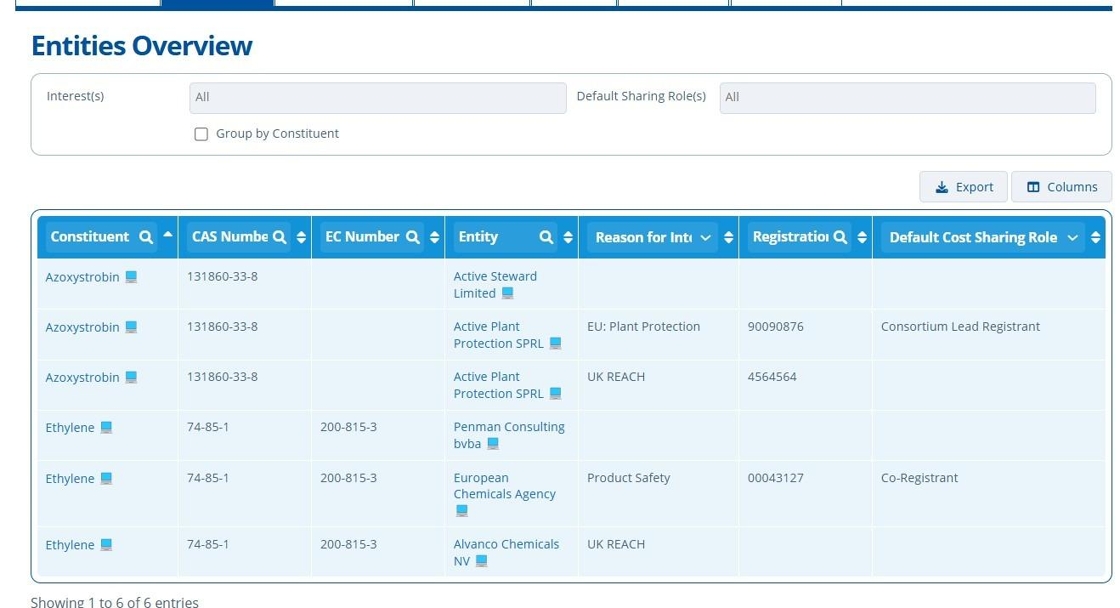
Tip
See that the entities that got added in the previous step are those actively linked with this study's constituent, Ethylene, and those with study related roles (Only Representative or Registrant - See the roles assigned in the below screenshot).

Link Entities Based on their Reason For Interest (Optional)
6. 👆 Create a new study 👉 Select the constituent that the study is for.
7. 👆 Select a "Study Purpose". The entity link's "Reason for Interest" must meet this purpose if they are to be linked. To "meet" the purpose means the following:
For NON-EU REACH roles:
- The entity link's "Reason for Interest" must match the study's "Purpose".
For EU REACH roles:
- The entity link's "Reason for Interest" must match the study's "Purpose". Or the Annex Number in the "Reason for Interest" must be higher than the Annex Number in the study's "Purpose".
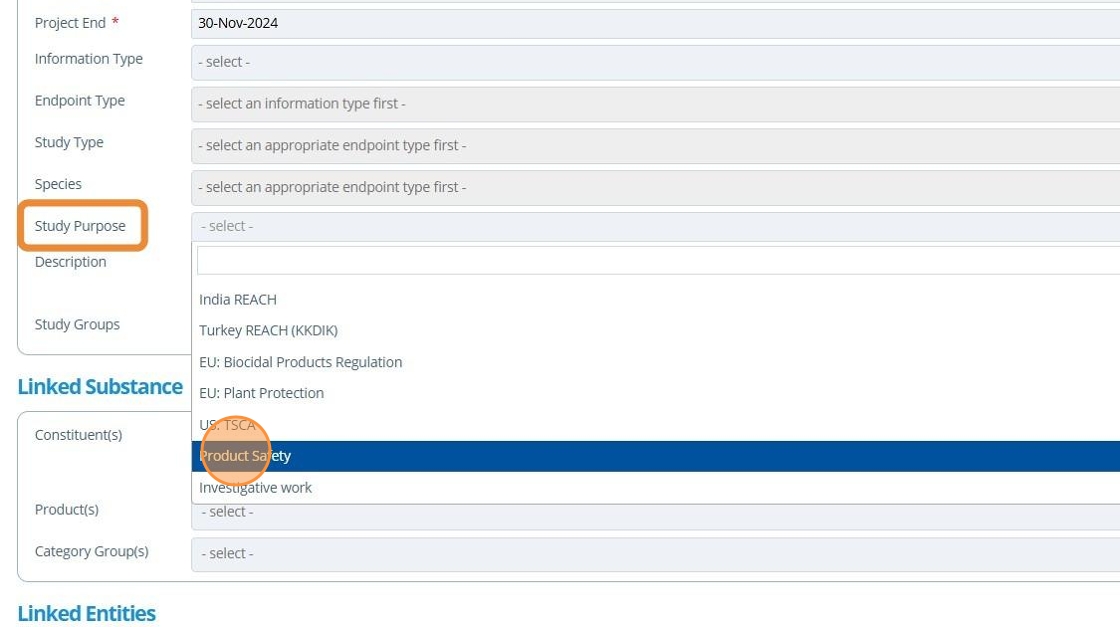
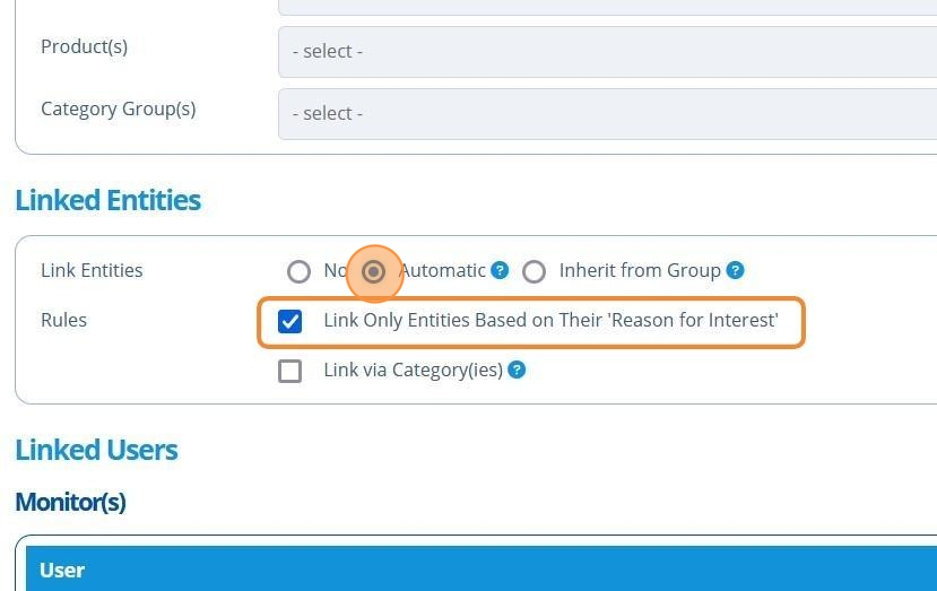
8. 👆 Tick the "Automatic" option and ensure that "Link Only Entities Based on Their 'Reason for Interest'" is ticked and "Link via Category(ies) is unticked.
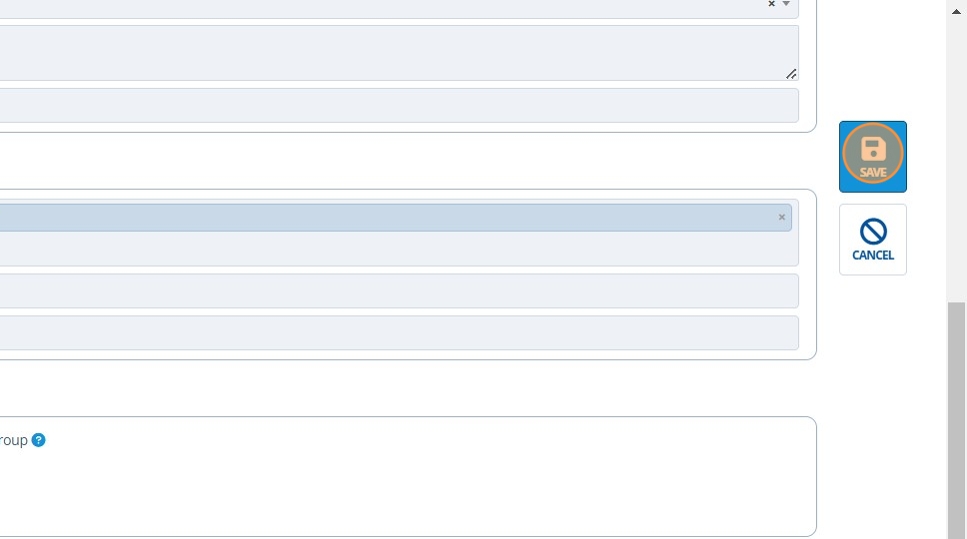
9. 👆 Click "SAVE" to create the study.
10. 🥳 An entity is linked.

Tip
The other 3 entity-links in step 5 are no longer linked as they do not have the relevant Reason for Interest to match this study's Purpose.

Link After Study Creation
Tip
The following steps achieve the same result as the section above.
Link Entities with Study Related Roles
11. 👆 On the relevant study record 👉 Navigate to "Costs & Invoicing" 👉 "Cost Sharing" 👉 "Entities" 👉 Click "EDIT".
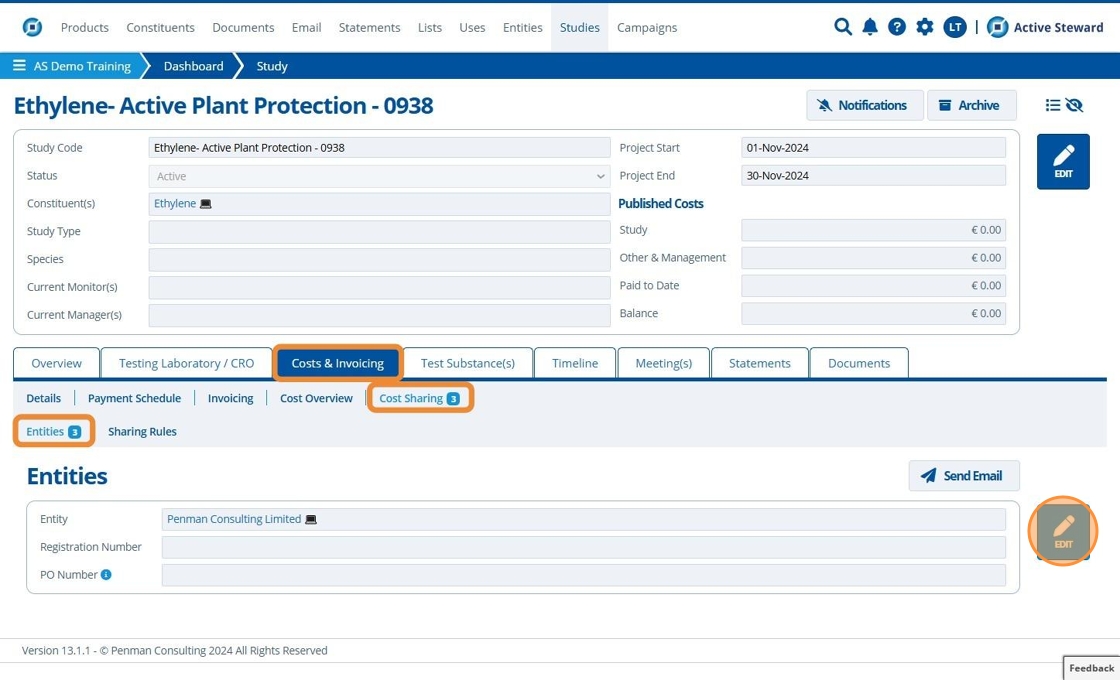
12. 👆 Click "Add All Interested Entities".

13. 👆 Untick the checkbox for "Link Only Entities Based on Their 'Reason for Interest'".
👉 Tick "Remove Existing Entity Links" to overwrite the prior links.
👉 Click "Add".

14. 👆 Click "SAVE".

15. 🥳 See that 4 entities have been linked to the study record.

Link Entities Based on their Reason For Interest (Optional)
16. 👆 On the relevant study record 👉 Navigate to "Costs & Invoicing" 👉 "Cost Sharing" 👉 "Entities" 👉 Click "EDIT".

17. 👆 Click "Add All Interested Entities".

18. 👆 Tick the checkbox for "Link Only Entities Based on Their 'Reason for Interest'".
👉 Tick "Remove Existing Entity Links" to overwrite the prior links.
👉 Click "Add".

19. 👆 Click "SAVE".

20. 🥳 An entity is linked.

Automatically Link Entities Via Category Group
View the Category Group's Linked Entities
21. 👆 Navigate to the relevant Category Group 👉 Click on the Entities tab.

22. 🥳 The information shown here is automatically pulled from the constituents in this group (the constituents in this example are Azoxystrobin and Ethylene).
The information shown is the constituent-entity links for Azoxystrobin and Ethylene. To create constituent-entity links, see this tutorial.
Link at Study Creation
Link Entities with Study Related Roles
23. 👆 Create a new study
Ensure that:
- The Category Group is linked.
- "Link Entities" is set to "Automatic".
- "Link Only Entities Based on Their 'Reason for Interest'" is unticked.
- "Link Via Category(ies)" is ticked.

Tip
Any additional constituents linked in the "Constituent(s)" field will not be considered for automatic linking - it is only constituents that are part of the category group.
24. 👆 Click "SAVE".

25. 👆 Navigate to Costs & Invoicing 👉 Cost Sharing 👉 Entities.

26. 🥳 See that 4 Entities are automatically linked.

Link Entities Based on their Reason For Interest (Optional)
27. 👆 Create a new study.
Ensure that:
- The "Study Purpose" is populated.
- The Category Group is linked.
- "Link Entities" is set to "Automatic".
- "Link Only Entities Based on Their 'Reason for Interest'" is ticked.
- "Link Via Category(ies)" is ticked.

28. 👆 Click "SAVE".

29. 👆 Navigate to Costs & Invoicing 👉 Cost Sharing 👉 Entities.

30. 🥳 See that 2 Entities are automatically linked.
Note that their reason for interest matches the study purpose selected in step 27.

Link After Study Creation
Tip
The following steps achieve the same result as the section above.
31. 👆 Navigate to the relevant study 👉 Costs & Invoicing tab 👉 Cost Sharing 👉 Sharing Rules.

32. 👆 Click "EDIT".
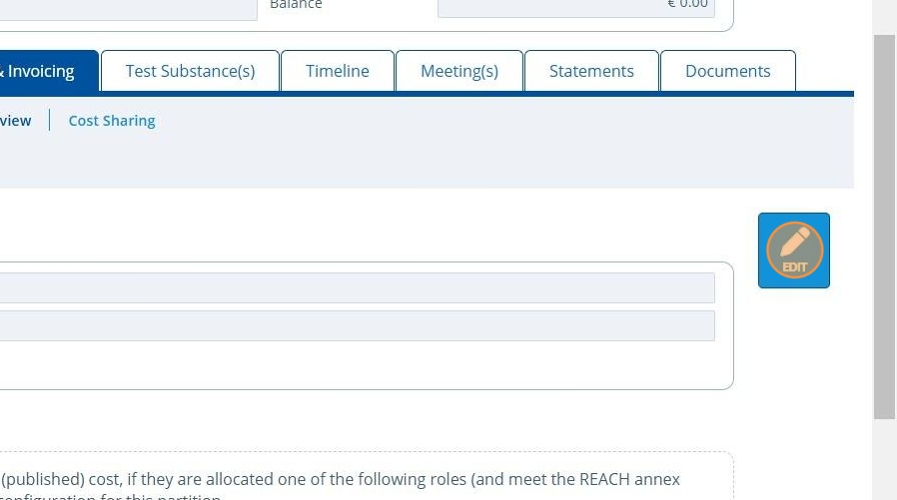
33. 👆 Tick the "Link via Category(ies)" field.
Note that only the assigned study manager(s) can perform this action.

34. 👆 Click "SAVE".

Link Entities with Study Related Roles
35. 👆 Navigate to the "Entities" sub tab 👉 Click "EDIT".

36. 👆 Click "Add All Interested Entities".

37. 👆 Untick the "Link Only Entities Based on Their 'Reason for Interest'" field.
👉 Note that "Link via Category(ies)" cannot be deselected here since being ticked in step 33 on the Sharing Rules tab.
👉 Tick "Remove Existing Entity Links" to overwrite the prior links.
👉 Click "Add".

38. 👆 Click "SAVE".

39. 🥳 See that 4 entities are automatically linked.

Link Entities Based on their Reason For Interest (Optional)
40. 👆 Navigate to the relevant study 👉 Costs & Invoicing 👉 Cost Sharing 👉 Entities 👉 Click "EDIT".
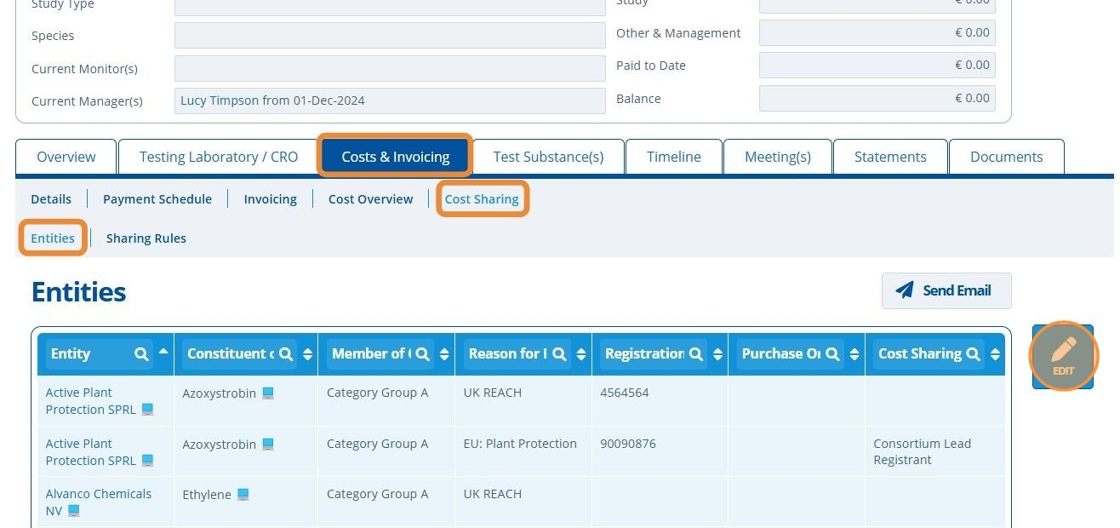
41. 👆 Click "Add All Interested Entities".
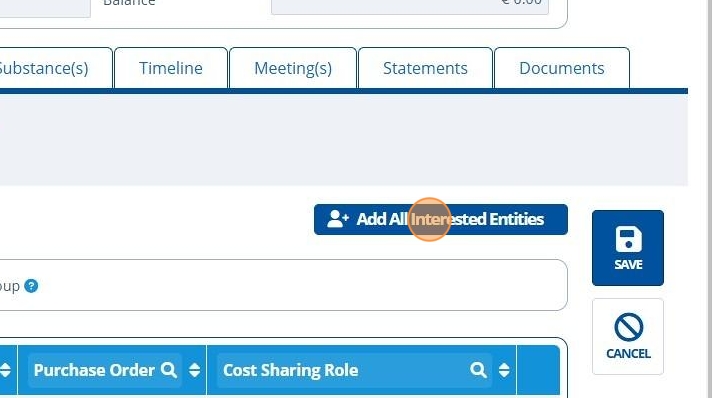
42. 👆 Tick the "Link Only Entities Based on Their 'Reason for Interest'" field.
👉 Note that "Link via Category(ies)" cannot be deselected here since being ticked in step 33 on the Sharing Rules tab.
👉 Tick "Remove Existing Entity Links" to overwrite the prior links.
👉 Click "Add".

43. 👆 Click "SAVE".

44. 🥳 See that 2 Entities are linked.
Note that their reason for interest matches the study purpose selected in step 33.
