Bulk Upload Campaign Contacts and Edit Roles
Tip
Contacts need to be added to a campaign (and assigned the relevant roles) to view restricted pages. Contacts / viewing roles can be new or already existing when bulk uploading / updating. This tutorial details how to update and upload within one campaign. To bulk update / upload to multiple campaigns in the partition, see Bulk Data.
Upload Contacts and Edit Roles
1. 👆 Navigate to Campaigns 👉 Select the campaign of interest from the list.

2. 👆 Click the "Contacts" tab 👉 Navigate to "Contacts".

3. 👆 Click "Upload Contacts".

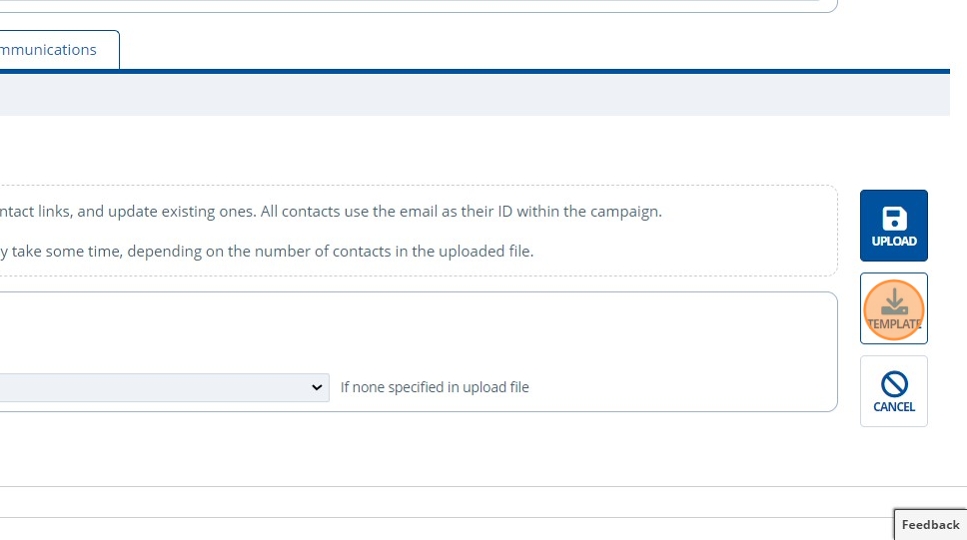
4. 👆 Click "TEMPLATE" to 📥 download the upload template. Use this file to ✍️ fill in contact information.

Tip
Here is a preview of the upload file. Contacts and viewing roles can be new or already existing. The entities must already exist. The contact is determined by the email address given, so this must be unique (not already existing in the system). Multiple roles can be put into the "Viewing Role(s)" field - each separated onto a new line.

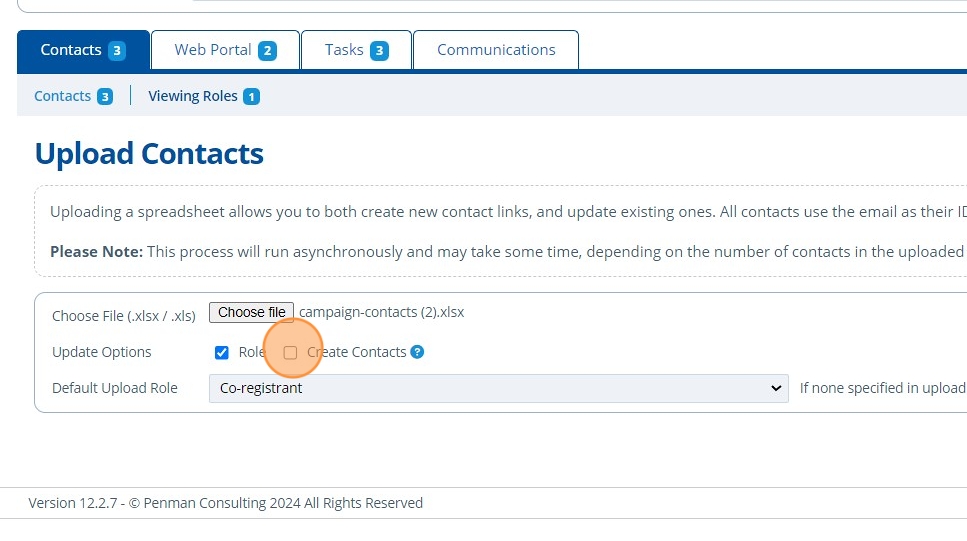
5. 📤 Upload a file by clicking the "Choose file" button.

6. 👆 Tick the relevant checkboxes to choose update options.
The "Role" checkbox: If the contact already exists within the campaign, their viewing role(s) will be updated to what is given in the upload file.
The "Create Contacts" checkbox: Creates new contacts from the file if they do not yet exist in Active Steward.

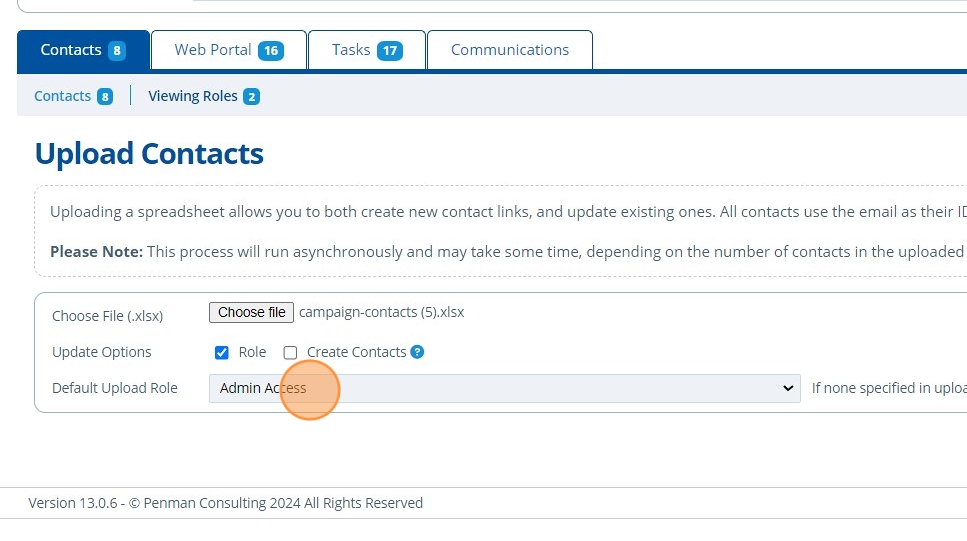
7. 👆 Choose the "Default Upload Role". If the "Viewing Role(s)" field in the upload file is empty, this is the role the contact will be given instead.

8. 👆 Click "UPLOAD".

9. ⏱️ Wait, then refresh the page to check if the contacts have finished updating.

10. 🥳 The new contacts from the file are uploaded and assigned their viewing role(s) as expected. The existing contact has also been added/assigned to the campaign.

Bulk Update Viewing Roles
11. 👆 Navigate to the Contacts tab 👉 Contacts 👉 Click "Export".

12. 📥 The export file will download 👉 Open it in Excel.
The Excel file has a column that lists the current roles contacts have assigned to them ("Viewing Role(s)").
The following steps show examples of making changes to these roles.

13. ✍️ Give a contact that currently has one viewing role, two viewing roles. Each role must be put on a separate line.

14. ✍️ Remove all viewing roles for a contact (empty the cell).

15. ✍️ Give a contact a new role that does not yet exist and clear their existing roles.

16. ✍️ Remove a contacts existing role and replace with another.

17. 👆 Return to Active Steward 👉 Click "Upload Contacts".

18. 👆 Click the "Choose File (.xlsx)" field, and 📤 upload the Excel file.

19. 👆 Choose the default role that will be given to contacts if the "Viewing Role(s)" cell is empty in the file.

20. 👆 Click "UPLOAD".

21. 🥳 See from step 13 that this contact now has the additional role assigned to them.

22. 🥳 See from step 14 that this contact has been assigned the default role selected in step 19.

23. 🥳 See from step 16 that this contact now has their viewing role replaced with another.

24. 🥳 See from step 15 that this contact is now assigned to the new viewing role entered into the Excel sheet. The new role has been created in the campaign.

25. 🥳 The roles for the following highlighted contacts remain unaffected as no changes were made in the upload file.
