Create, Send and Link an Issue & Statement
Tip
Issues & Statements are used to store questions received from clients. The questions can be linked to various records in Active Steward.
It is a standardised way of responding to a raised issue. The response includes a statement, basis, review date and supporting evidence (if required).
Issues & Statements can be displayed on campaign pages, where users can review them. They can also be sent out to contacts via email, or multiple issues can be sent at once using an "Issue Statement(s) Report".
I & S's can send out notification reminders 30 days before the "Statement Review Date" to help keep track of issues. Users that will receive this are ones who have enabled notifications for that I&S record - see step 8 for more detail.
Create an Issue & Statement
1. 👆 Navigate to Statements 👉 Add Issue & Statement.

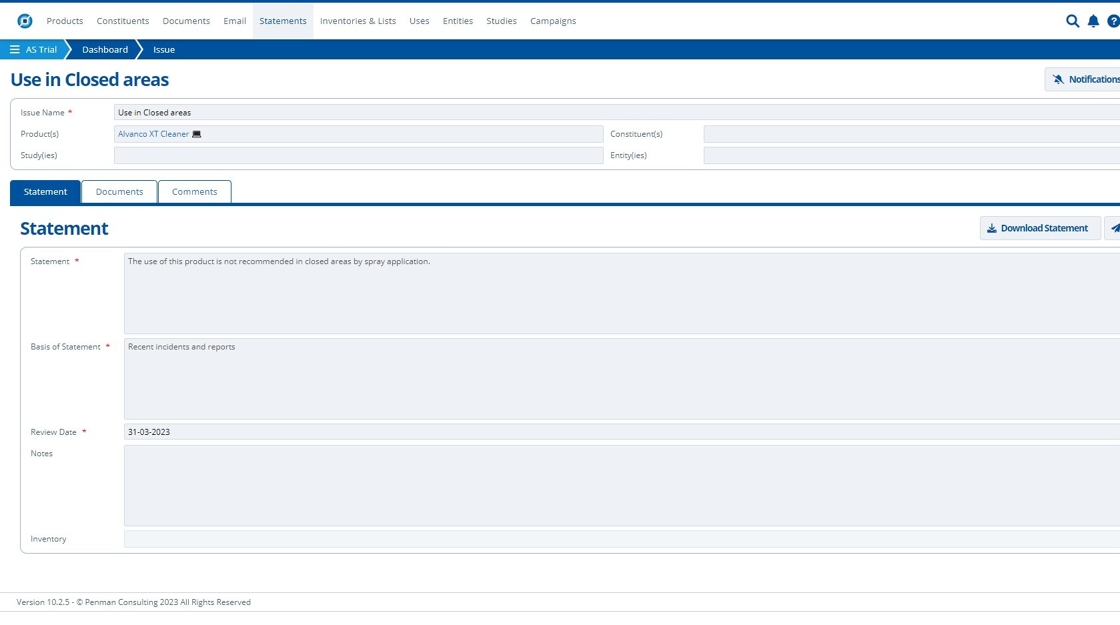
2. ✍ Fill in the "Issue Name" field. The "Issue Name" is usually the question asked or issue raised.

3. 👆 Link any records (Product, Constituent, Study or Entity) that the Issue & Statement relates to.
This example is related to the product "Alvanco XT Cleaner".

4. ✍ Fill in the "Statement" field. This is usually the response to the question asked or issue raised.

5. ✍ Fill in the "Basis of Statement" field. This is to explain the reasoning behind the text in the "Statement" field. Also, ✍ select a "Review Date". This is the date the Issue was reviewed and the Statement was written.

6. 👆 Click "Select Documents" to link supporting documents.

7. 👆 Click "SAVE".

8. 👆 Click the "Notifications" button to enable reminders 30 days before the statement "Review Date". This will also enable notifications when comments are added to the record.

9. 🥳 The issue/statement has been created and saved.

Send an Issue and Statement
Tip
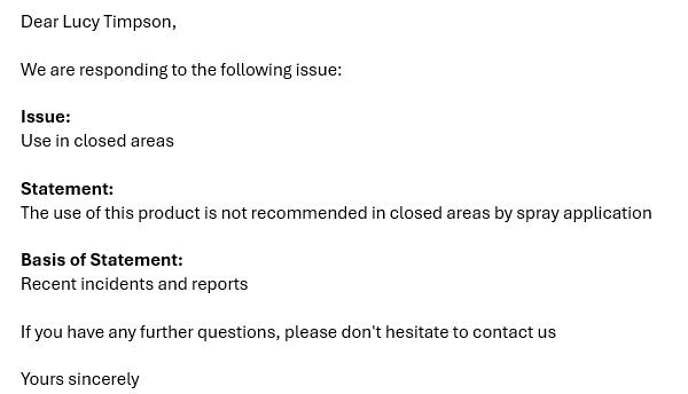
These can only be sent to contact email addresses that exist in Active Steward (Create a Contact / Create a User). Below is a preview of how the email will display when sent.

10. After saving the new Issue & Statement, 👆 click the "Send Statement" button to send this response back to the client.

11. The Issue Statements Email Wizard opens 👉 Follow the instructions in the wizard to send the email.

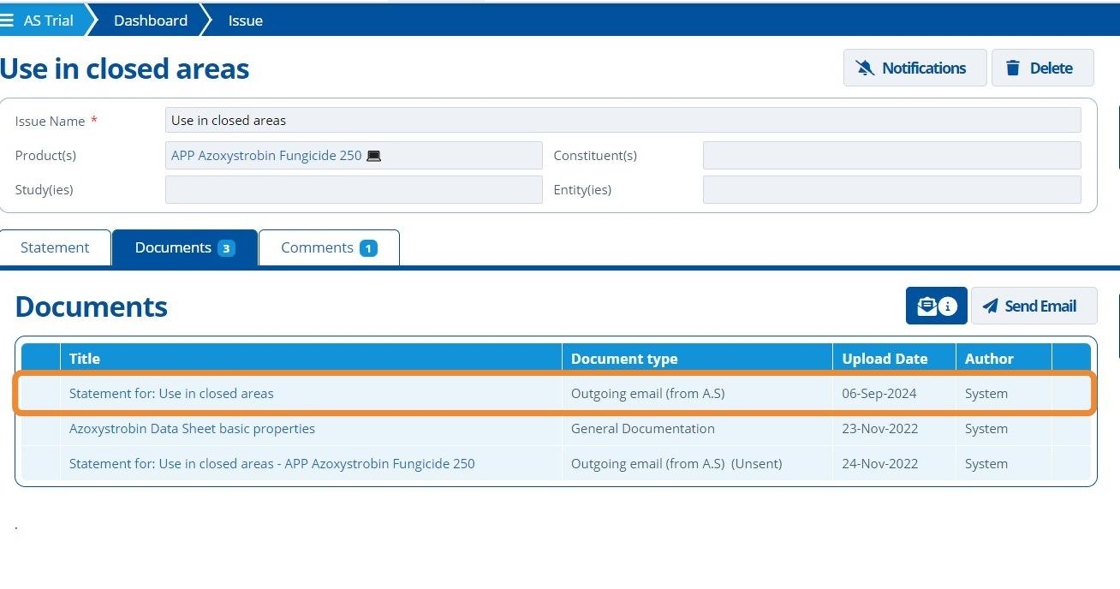
12. 🥳 The sent email can be found in the "Documents" tab on the Issue & Statement record.

Tip
Multiple Issues can be responded to at once by navigating to Documents 👉 Wizards 👉 Issue Statement(s) Report. Follow the instructions in the email wizard to send out the report.
Link Issues & Statements
Tip
Issues & Statements can be linked to Products, Constituents, Entities and Studies (as seen in step 3). The "Issue Link Overview" can be used to update links quickly.
13. 👆 Navigate to Statements 👉 Link Issues & Statements.

Tip
The table displays all the Issues & Statements in the partition. The columns show the existing links between the I&S and Entities, Studies, Constituents and Products.
14. 👆 Click the "Click to Add Links" field for one of the Issue & Statements.

15. 👆 Choose an option from the dropdown list to create the new link.

Tip
👆 Click the "x" icon to delete a link.
16. 🥳 Rows turn green to indicate that links were successfully updated.
